Merry Christmas! Today I'm sharing one of my all-time favorite Christmas cards. This card was actually made two years ago for a stamp camp, but it slipped through the cracks during one of my long gaps between postings.
 |
| Click on image for closer look. |
(NOTE: Some of the materials for this card are retired, but all of the dies are still available and that's the most important feature of this card. If you don't have the retired items and are insistent on making this card exactly as is, I've had good luck locating retired Stampin' Up! items online by searching eBay, Etsy, and Google.)
Materials
Stamp Sets
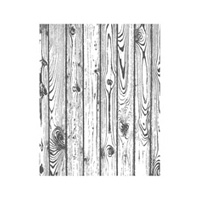
* Hardwood Background Stamp
* Stitched with Cheer Photopolymer Stamp (142182, retired)
Paper
* Early Espresso card stock (8-1/2" x 5-1/2")
* Real Red card stock (5-1/4" x 4")
* Crumb Cake card stock (5-1/2" x 4-1/4", ripped to about 5" x 3-3/4")
* Garden Green card stock (scraps for circle and pine branches)
* Soft Suede card stock (scraps for circle and pine branches)
* Whisper White card stock (scrap for banner)
* Sparkle Glimmer Paper (scrap for sprig)
* Candy Cane Lane Designer Series Paper ("DSP") (141981, retired)
Ink
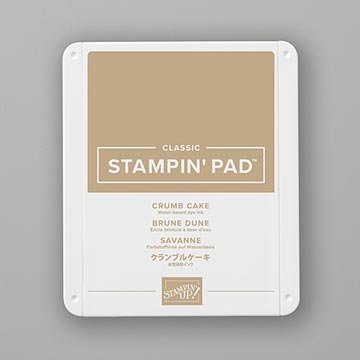
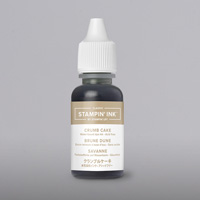
* Crumb Cake Classic Stampin' Pad
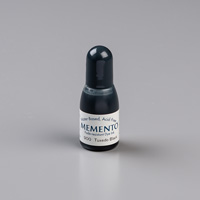
* Tuxedo Black Memento Pad
Accessories and Tools
* Big Shot Die Cutting Machine
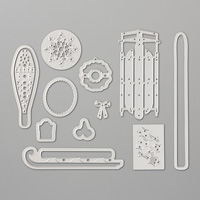
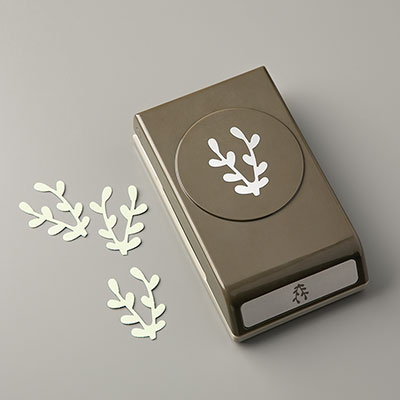
* Pretty Pines Thinlits Dies
* Swirly Scribbles Thinlits Dies
* Bow Builder Punch (137414, retired)
* Linen Thread
* Solid Red Baker's Twine (see note below)
* Stampin' Sponge
* Adhesives: SNAIL Adhesive, Multipurpose Liquid Glue, Glue Dots, Stampin' Dimensionals
Instructions
1. Score 8-1/2" x 5-1/2" card stock at 4-1/4"; fold away from score line to create card.
2. Use SNAIL Adhesive to adhere Real Red 5-1/4" x 4" card stock to front of card.
3. Use Crumb Cake ink to stamp Hardwood image on 5-1/2" x 4-1/4" Crumb Cake card stock. Rip edges to create 5" x 3-3/4" or smaller rectangle; use Stampin' Sponge to apply ink around edges; adhere to front of card.
4. Use Big Shot and Pretty Pines Thinlits Dies to cut the following:
* 2 large pine branches from Garden Green card stock
* 2 medium pine branches Garden Green card stock
* 2 small pine branches from Soft Suede card stock
* 1 Sprig from Sparkle Glimmer Paper
5. Use Big Shot and Swirly Scribbles Thinlits Dies to cut the following:
* 1 medium size circle from Garden Green card stock
* 1 medium size circle from Soft Suede card stock
6. Referring to photo for placement, use Liquid Glue to adhere the pieces cut in steps 4 and 5 in the following order, starting from the bottom and building up: Soft Suede circle; Garden Green circle; bottom two Garden Green medium pine branches, middle Soft Suede small pine branches, top Garden Green large pine branches, Glimmer Paper sprig.
7. Punch bow pieces from DSP; assemble bow and wrap several times with Linen Thread and Red Baker's Twine held together; tie in a knot in the back and adhere to card with Glue Dots.
(NOTE: If you don't have the Bow Builder Punch, make a bow from ribbon! If you don't have any Red Baker's Twine, Red Craft Floss works great too -- available at any craft store.)
8. Use Memento Ink to stamp Christmas Joy banner on Whisper White card stock. Use Big Shot and Banner Die to cut out. Lightly sponge Crumb Cake ink over image and adhere to card with Stampin' Dimensionals.
A lot of pieces parts, yes. But I think the card was totally worth the effort, don't you?
Sending you all wishes for a wonderful Christmas!
Cathy ;D