|
| Click on photo for closer look. |
A big thanks to Stampin' Up! Demonstrator Libby Fens for this idea. Click HERE to see Libby's original design.
Materials
Paper
* Merry Merlot card stock (5-1/2" x 4-1/4"; scraps for butterflies)
* Whisper White card stock (5-3/16" x 3-15/16" for layer; 10" x 3" for kite; 3" x 11/16" for label)
* Melon Mambo card stock (5-1/16" x 3-13/16" for layer; 3-3/4" x 3/4" for label)
* Blushing Bride card stock (4-7/8" x 3-5/8")
* Melon Mambo polka-dot Designer Series Paper ("DSP") (4-3/4" x 2-3/4")**
Other Stuff
* Simply Scored Scoring Tool
* Simply Scored Diagonal Plate**
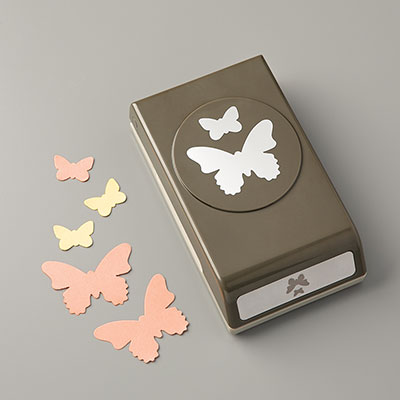
* Butterfly Duet Punch
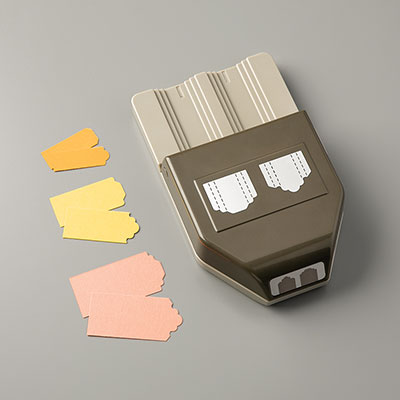
* Lovely Labels Pick a Punch
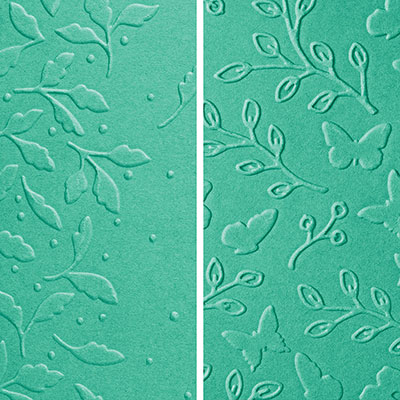
* Meadow Moments Embossing Folder (butterflies)
* Tasteful Textile 3D Embossing Folder (background)
* Greetings Thinlits Dies**
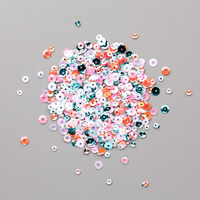
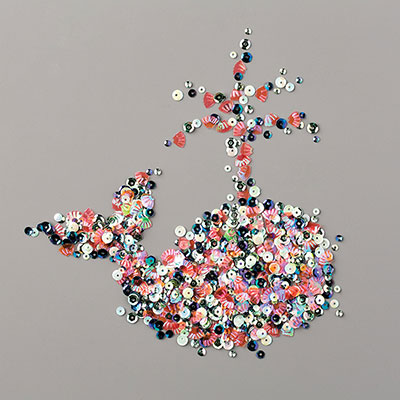
* Iridescent Sequins**
* White Curling Ribbon (6")***
* Velcro Thin Clear Fasteners***
* Adhesives: Tombow Liquid Glue; Stampin' Seal; Stampin' Seal+ or Tear and Tape; Shimmery Crystal Effects
** Stampin' Up! retired items
*** Items from my stash
Assembly
Stampin' Seal used to assemble card, unless otherwise indicated.
1. Adhere 5-3/16" x 3-15/16" Whisper White card stock to Merry Merlot card stock.
2. Adhere 5-1/16" x 3-15/16" Melon Mambo card stock over Whisper White card stock.
3. Use Tasteful Textile 3D Embossing Folder to add texture to Blushing Bride card stock. Adhere over Melon Mambo card stock.
4. Use Lovely Labels Pick a Punch to trim each end of 3-3/4" x 3/4" Melon Mambo card stock.
5. For the greeting, I used Stampin' Up! retired Greetings Thinlits Dies to cut "hello" from center of 3" X 11/16" white card stock. I then scanned it into my Scan 'n Cut machine and slightly reduced the size before cutting. (A good alternative would be to stamp a greeting of your choice on 3" x 11/16" white card stock using Merry Merlot, Melon Mambo or Black ink.) Adhere greeting to 3-3/4" x 3/4" Melon Mambo card stock, and then adhere label over embossed card stock -- the bottom of label is about 1" from bottom of card.
6. To make the kite, with inside of card facing up, score 10" x 3" Whisper White card stock at 5". Turn paper over so outside of card is facing up and score diagonally from long edge of paper beginning at 3-1/2" from top edge and crossing over center of 5" score line. Repeat on opposite long edge. You should now have an "X" with the diagonal scores crossing at the center of the 5" score line. Use a pencil to make a small dot at the bottom center. (See diagram below.)
 |
| Click on image for closer look. |
NOTE: If you happen to have the retired Stampin' Up! Simply Scored Diagonal Plate in your stash, the diagonal score lines are very easy to make. If you don't have it, you can still accomplish this using any scoring board: Use a pencil to mark 3-1/2" from the top and 3-1/2" from bottom on each side, and then turn your paper at a 45 degree angle to make your score lines from dot to dot.
7. Fold card stock back along center score line; turn card stock over and fold back along each diagonal score line. Fold sides to inside at center score line (they should actually fall into place without much effort since they've already been scored and folded) so you have a shape that looks like a house. Burnish with a bone folder to make the folds nice and crisp, and then cut through both thicknesses from fold line to pencil mark at bottom center.
 |
| Click on image for closer look. |
Video Tutorial: Ok . . . now that I've written this all out . . . you can actually view a great YouTube video tutorial by clicking HERE. Note that the card being made in this video is a slightly different size and shape than mine, so the measurements are slightly different. But the folding technique and assembly is the same. (I had planned to make a video myself, but I'm not quite ready to take that step yet.)
8. To make DSP layer that goes on front of kite, trace around kite shape on a scrap piece of card stock and then use a ruler to draw parallel lines inside the shape 1/8" from each side. Cut on inside lines to make a template that you can use to cut as many pieces of DSP as you need to make the dozens of kite cards you will be making.
9. Apply strong adhesive (i.e., Stampin' Seal+, Tear and Tape, or Liquid Glue) to back of kite card and adhere to card base over textured card stock and label. Use scissors to curl the ribbon and then attach one end to inside of front flap with a glue dot or liquid glue.
10. Attach self-adhesive Velcro fastener to inside of kite near bottom tip. The easiest way I found to do this is to first fasten the two sides of Velcro together. Remove the backing from one side and attach it to the bottom tip of the card (the side attached to the card base). Then remove the top backing piece and carefully line up and fold the front of the kite down over the Velcro. This assures perfect placement on both flaps of the card. (TIP: These little fasteners are pretty sticky, but I've found that it's usually a good idea to allow the adhesive to "set" for a little while before opening the card to make sure you don't tear it back off on the first opening.)
11. Use the Butterfly Duet punch to cut two small and one large butterflies from Merry Merlot card stock. Use the Meadow Moments embossing folder to add texture to the butterflies. Fold wings up slightly and adhere to card with a small amount of liquid glue or glue dots at the center, allowing the wings to flap freely.
12. Now it's time to have fun with the sequins. Use a tiny dot of Shimmery Crystal Effects to adhere each sequin wherever they make you happy. (TIP: I find it helpful to apply the glue to the card and then place the sequin on the dot of glue -- much easier and less messy than trying to apply glue to the back of the tiny sequins.) If you don't have a good liquid glue for adhering sequins, mini glue dots also work.
That's it! Your card is finished and you're ready to add a personal message inside the kite and send it flying to a friend.

NOTE: Because I was using retired DSP to make this card and had only a limited amount of each color, I made three different versions. Below the photo are listed the colors used for the other two color schemes.

Card on left:
* Card base and butterflies: Terracotta Tile card stock
* Layers: Whisper White card stock, Calypso Coral card stock, Petal Pink card stock
* Label: Calypso Coral card stock
* DSP: Calypso Coral
Center:
* Card base and butterflies: Cajun Craze card stock
* Layers: Whisper White card stock, Pumpkin Pie card stock; So Saffron card stock
* Label: Pumpkin Pie card stock
* DSP: Pumpkin Pie
Card on right: See materials list above.
I hope you enjoy this card! It sure was fun for me to make it . . . and I also enjoyed learning how to make the kites!
Happy Summer!
Cathy ;D


Alternate Color Schemes: