The list of items that will be retired when the new 2020-2021 Annual Catalog is released was unveiled today. Visit my Current Promotions page to view the lists of items that will no longer be available when the new catalog goes live on June 3. NOTE: These items are available only through June 2, OR WHILE SUPPLIES LAST!!! So if you see anything on those lists that you can't live without, you need to act fast! Once these lists are published, everything disappears very quickly.
Now I'm off to mark up my catalogs and start pulling retiring items from my shelves.
Cathy ;D
Wednesday, April 22, 2020
Monday, April 20, 2020
How to Create Two Cards at a Time
Thanks to Joanne James for knocking me out of my doldrums and inspiring me to make this card! I love it the idea that you can make two cards from only one sponged piece of card stock! Click HERE to visit Joanne's blog, The Crafty Owl, and see her original card (which looks strikingly similar to mine), along with her explanation of how and why she created this card.
Materials
Stamp Sets
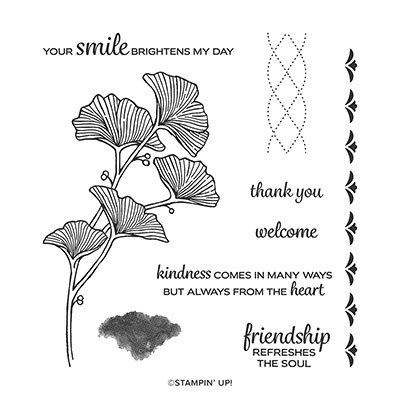
* Beautifully Braided **
* Butterfly Gala ("a little note")
* Peaceful Moments ** ("Thank You")
Paper
* Whisper White card stock (5-1/4" x 4" - 3 pieces)
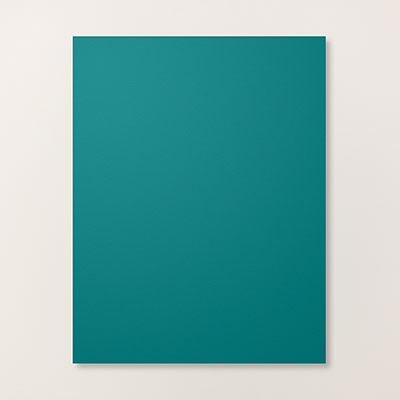
* Pretty Peacock card stock (8-1/2" x 5-1/2") for top card
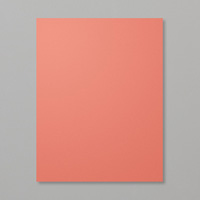
* Terracotta Tile card stock (8-1/2" x 5-1/2") for bottom card
Ink
* Black Ink Pad of your choice
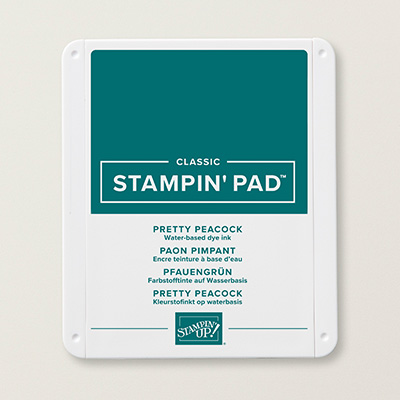
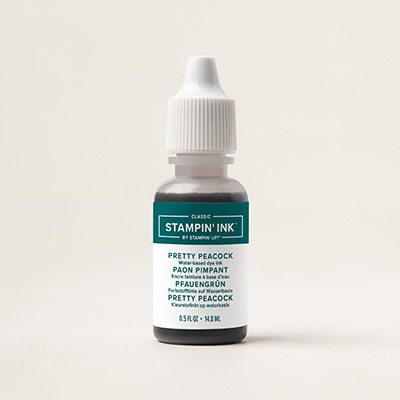
* Pretty Peacock Classic Stampin' Pad
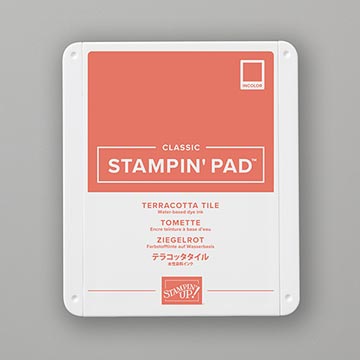
* Terracotta Tile Classic Stampin' Pad
Optional Ink Colors (see notes below)
* Bermuda Bay Classic Stampin' Pad
* Coastal Cabana Classic Stampin' Pad
* Blushing Bride Classic Stampin' Pad
* Calypso Coral Classic Stampin' Pad
Other Stuff
* Stamparatus or Stamp-a-Ma-Jig (retired) or other stamp positioner
* Stitched Rectangle Dies
* Large Post-it Note
* Paper Snips
* Stampin' Sponges
* Silver Metallic Pearls
* Adhesives: SNAIL Adhesive; Stampin' Up! 2-Way Glue (retired) or other removable adhesive
** 2020 January-June Mini Catalog
Assembly
(NOTE: Unless otherwise indicated, SNAIL Adhesive used to assemble card.)
1. Score Pretty Peacock and Terracotta Tile 8-1/2" x 5-1/2" card stock at 4-1/4"; fold away from score lines to create card bases.
2. Use Stamparatus or other stamp positioner to stamp the Beautifully Braided flower image on each of the three 5-1/4" x 4" pieces of Whisper White card stock with Black Ink. It's important that each of these images be stamped in exactly the same position.
3. Stamp flower image on large Post-it Note or other very thin paper, and cut out with Paper Snips. (Yes, I'm actually asking you to fussy cut this -- unless you have another magic way of cutting out the image since there is no coordinating die. It's kind of a pain, but so worth it when you see the finished card!!!)
4. Use removable adhesive to position image cut from Post-it Note over the flower image on one of the three stamped pieces of Whisper White card stock. Use Stampin' Sponges to daub ink over the entire piece of card stock as follows: (IMPORTANT NOTE: DO NOT RUB the ink on -- those little berries are extremely fragile and could easily be torn off.)
Note that I used 6 different colors to sponge my sample, but you can achieve a very similar result by using just two colors. See alternate method below.
4a. Beginning at the center with the lightest color (Blushing Bride), daub ink from upper right-hand corner to lower left-hand corner of card stock.
4b. Moving toward the upper left-hand corner, daub Calypso Coral ink next to and slightly overlapping the Blushing Bride ink.
4c. Continuing to move toward the upper left-hand corner, lightly daub Terracotta Tile ink next to and overlapping the Calypso Coral ink, gradually daubing heavier amounts of ink as you move toward the corner.
4d. Moving toward the lower right side of the card stock, daub Coastal Cabana ink from corner to corner next to and slightly overlapping the Blushing Bride ink.
4e. Continuing to move toward the lower right-hand corner, daub Bermuda Bay ink next to and slightly overlapping the Coastal Cabana ink.
4f. Continuing to move toward the lower right-hand corner, daub Pretty Peacock ink next to and slightly overlapping the Bermuda Bay, gradually daubing heavier amounts of ink as you move toward the corner.
4g. When all the colors have been applied, very lightly daub Terracotta Tile ink over the lower right side of the card to add just a faint touch of the pinkish colors. Repeat with the Pretty Peacock ink, very lightly daubing some of the blue-greenish color into the pinkish colors on the upper left side.
4h. Remove Post-it Note to reveal the white flower image.
Alternate Steps 4a-f: As noted above, for my sample I used 6 different varying shares of ink. You can achieve a very similar effect by using just the two darkest colors (Terracotta Tile and Pretty Peacock). Begin by daubing the ink lightly in the center corner-to-corner area, and then gradually daubing heavier amounts of ink as you move toward the outside corners.
5. Carefully line up the 4" x 2-5/8" Stitched Rectangle die in the center of the stamped and sponged card stock to cut out the center section.
6. Adhere the outer "frame" piece over one 5-1/4" x 4" piece of stamped Whisper White card stock, being careful to line up the stamped images. Use Black Ink to stamp sentiment as shown. Adhere to Terracotta Tile card front. (NOTE: If you have difficulty lining up the images and the outer edges of the card stock, you can trim the edges of the Whisper White card stock slightly so it doesn't peek out from behind the sponged card stock.)
7. Adhere the center piece of the sponged card stock over the remaining 5-1/4" x 4" piece of stamped Whisper White card stock, again being careful to line up the stamped images. Use Black Ink to stamp sentiment as shown. Adhere to Pretty Peacock card front.
8. Attach self-adhesive Silver Metallic Pearls as shown.
And now you have two beautiful cards to add to your stash or send to two friends!
Cathy ;D
 |
| Click on image for closer look. |
Materials
Stamp Sets
* Beautifully Braided **
* Butterfly Gala ("a little note")
* Peaceful Moments ** ("Thank You")
Paper
* Whisper White card stock (5-1/4" x 4" - 3 pieces)
* Pretty Peacock card stock (8-1/2" x 5-1/2") for top card
* Terracotta Tile card stock (8-1/2" x 5-1/2") for bottom card
Ink
* Black Ink Pad of your choice
* Pretty Peacock Classic Stampin' Pad
* Terracotta Tile Classic Stampin' Pad
Optional Ink Colors (see notes below)
* Bermuda Bay Classic Stampin' Pad
* Coastal Cabana Classic Stampin' Pad
* Blushing Bride Classic Stampin' Pad
* Calypso Coral Classic Stampin' Pad
Other Stuff
* Stamparatus or Stamp-a-Ma-Jig (retired) or other stamp positioner
* Stitched Rectangle Dies
* Large Post-it Note
* Paper Snips
* Stampin' Sponges
* Silver Metallic Pearls
* Adhesives: SNAIL Adhesive; Stampin' Up! 2-Way Glue (retired) or other removable adhesive
** 2020 January-June Mini Catalog
Assembly
(NOTE: Unless otherwise indicated, SNAIL Adhesive used to assemble card.)
1. Score Pretty Peacock and Terracotta Tile 8-1/2" x 5-1/2" card stock at 4-1/4"; fold away from score lines to create card bases.
2. Use Stamparatus or other stamp positioner to stamp the Beautifully Braided flower image on each of the three 5-1/4" x 4" pieces of Whisper White card stock with Black Ink. It's important that each of these images be stamped in exactly the same position.
3. Stamp flower image on large Post-it Note or other very thin paper, and cut out with Paper Snips. (Yes, I'm actually asking you to fussy cut this -- unless you have another magic way of cutting out the image since there is no coordinating die. It's kind of a pain, but so worth it when you see the finished card!!!)
4. Use removable adhesive to position image cut from Post-it Note over the flower image on one of the three stamped pieces of Whisper White card stock. Use Stampin' Sponges to daub ink over the entire piece of card stock as follows: (IMPORTANT NOTE: DO NOT RUB the ink on -- those little berries are extremely fragile and could easily be torn off.)
Note that I used 6 different colors to sponge my sample, but you can achieve a very similar result by using just two colors. See alternate method below.
4a. Beginning at the center with the lightest color (Blushing Bride), daub ink from upper right-hand corner to lower left-hand corner of card stock.
4b. Moving toward the upper left-hand corner, daub Calypso Coral ink next to and slightly overlapping the Blushing Bride ink.
4c. Continuing to move toward the upper left-hand corner, lightly daub Terracotta Tile ink next to and overlapping the Calypso Coral ink, gradually daubing heavier amounts of ink as you move toward the corner.
4d. Moving toward the lower right side of the card stock, daub Coastal Cabana ink from corner to corner next to and slightly overlapping the Blushing Bride ink.
4e. Continuing to move toward the lower right-hand corner, daub Bermuda Bay ink next to and slightly overlapping the Coastal Cabana ink.
4f. Continuing to move toward the lower right-hand corner, daub Pretty Peacock ink next to and slightly overlapping the Bermuda Bay, gradually daubing heavier amounts of ink as you move toward the corner.
4g. When all the colors have been applied, very lightly daub Terracotta Tile ink over the lower right side of the card to add just a faint touch of the pinkish colors. Repeat with the Pretty Peacock ink, very lightly daubing some of the blue-greenish color into the pinkish colors on the upper left side.
4h. Remove Post-it Note to reveal the white flower image.
Alternate Steps 4a-f: As noted above, for my sample I used 6 different varying shares of ink. You can achieve a very similar effect by using just the two darkest colors (Terracotta Tile and Pretty Peacock). Begin by daubing the ink lightly in the center corner-to-corner area, and then gradually daubing heavier amounts of ink as you move toward the outside corners.
5. Carefully line up the 4" x 2-5/8" Stitched Rectangle die in the center of the stamped and sponged card stock to cut out the center section.
6. Adhere the outer "frame" piece over one 5-1/4" x 4" piece of stamped Whisper White card stock, being careful to line up the stamped images. Use Black Ink to stamp sentiment as shown. Adhere to Terracotta Tile card front. (NOTE: If you have difficulty lining up the images and the outer edges of the card stock, you can trim the edges of the Whisper White card stock slightly so it doesn't peek out from behind the sponged card stock.)
7. Adhere the center piece of the sponged card stock over the remaining 5-1/4" x 4" piece of stamped Whisper White card stock, again being careful to line up the stamped images. Use Black Ink to stamp sentiment as shown. Adhere to Pretty Peacock card front.
8. Attach self-adhesive Silver Metallic Pearls as shown.
And now you have two beautiful cards to add to your stash or send to two friends!
Cathy ;D


Friday, April 17, 2020
Another Ghosting Technique
Happy Friday morning, Stampers! So happy to see some sunshine out there today after this gloomy, cold, snowy week! It's not warm enough yet for me to go outside and enjoy the sun (I'm a wimp and don't walk with wet/icy streets and temps below 40), but the sun is shining brightly into my craft room where I'm working today.
As promised in my first ghosting technique article posted on April 13, I'm bringing you today a second ghosting technique. This one is also very easy . . . actually only two steps!
NOTE: Solid or shaded images work best for this technique, but you also could try outline stamps to see how it looks. Sentiments with big, bold letters also work well for this technique.
Technique: Ghosting 2
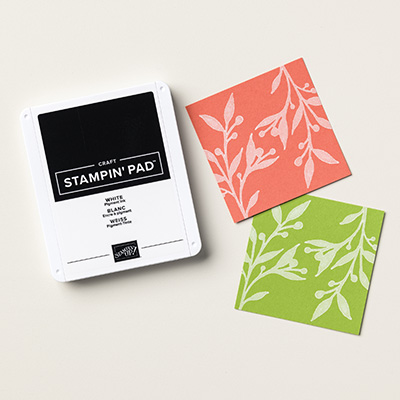
Step 1: Use Whisper White Craft Stampin' Pad to stamp image on color card stock.
Step 2: When dry, use any color to stamp same image over first image, offsetting slightly above, below, or off to the side.
That's it! Couldn't be much easier! So here's my sample.
Materials
Stamp Sets
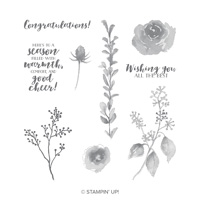
* First Frost (flowers)
* Peaceful Moments** (sentiment)
Paper
* Gorgeous Grape card stock (8-1/2" x 5-1/2"; 5-1/4" x 2")
* Whisper White card stock (5-1/4" x 4"; about 5-1/16" x 1" for braid punch; about 2-1/4" x 1-1/2" for sentiment; scraps for flowers)
* Highland Heather card stock (5-1/15" x 3-13/16")
* Soft Sea Foam card stock (scraps for leaf punch)
* Silver Foil (scraps for sprigs)
Inside
* Highland Heather card stock (5-1/4" x 4")
* Whisper White card stock (5-1/16" x 3-13/16")
Ink
* Craft Stampin' Pad and Whisper White Refill Ink
* Highland Heather Classic Stampin' Pad
* Gorgeous Grape Classic Stampin' Pad
* Basic Gray Classic Stampin' Pad
* Smoky Slate Classic Stampin' Pad
Other Stuff
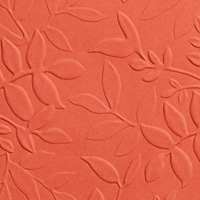
* Layered Leaves 3D Embossing Folder
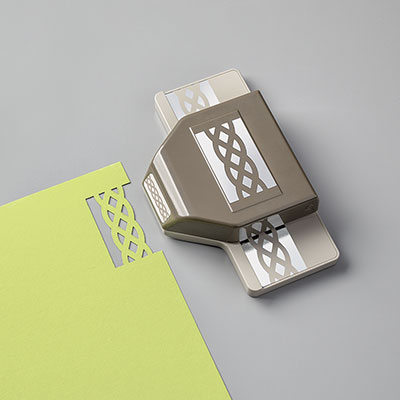
* Braided Border Punch**
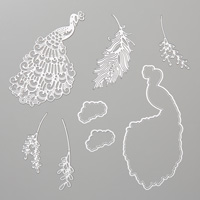
* Detailed Peacock Dies
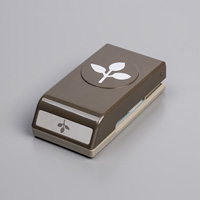
* Leaf Punch
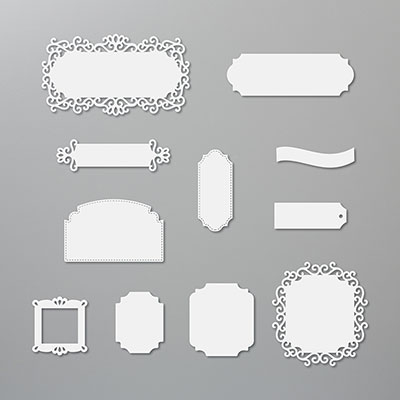
* Ornate Frames Dies***
* Wink of Stella Glitter Brush
* Stampin' Sponge (cut into fourths for easier handling)
* Adhesives: SNAIL Adhesive; Stampin' Dimensionals; Tombow Liquid Glue
** January-June 2020 Catalog
*** 2019 Holiday Catalog carryover item
Assembly
(Unless otherwise indicated, SNAIL Adhesive used to assemble card)
1. Score 8-1/2" x 5-1/2" Gorgeous Grape card stock at 4-1/4"; fold away from score line to create card base.
2. Adhere 5-1/4" x 4" Whisper White card stock to card front.
3. On 5-1/16" x 3-13/16" Highland Heather card stock, use Whisper White Craft ink to stamp flowers randomly. Allow a few minutes to dry.
4. Use Highland Heather Ink to stamp same flower images over Whisper White images, but offset slightly (about 1/8") to the upper left.
4a. Optional Step: Use Layered Leaves 3D Embossing Folder to add texture to stamped card stock.
4b. Adhere Highland Heather card stock to front of card over Whisper White card stock.
5. Adhere 5-1/16" x 2" strip of Gorgeous Grape card stock vertically about 3/4" from left edge of Highland Heather card stock.
6. Use Braided Border Punch to cut a 5-1/16" strip from Whisper White card stock. Apply Wink of Stella to braid shape; use small dots of liquid glue to adhere to center of Gorgeous Grape 2" wide card stock.
7. Assemble focal piece:
7a. Use Leaf Punch to punch two sets of leaves from Soft Sea Foam card stock.
7b. Use Detailed Peacock Dies to cut three or four sprigs from Silver Foil.
7c. Use Gorgeous Grape ink to stamp two large flowers and one small flower on scraps of Whisper White card stock. Cut out flowers.
7d. Assemble the center section with Liquid Glue, layering as follows:
Don't forget the inside!
Adhere Highland Heather 5-1/4" x 4" card stock to inside of card.
Use Smoky Slate ink to stamp spray on 5-1/16" x 3-13/16" Whisper White card stock; stamp and cut out another large flower (see step 7c above) and adhere over spray. Stamp sentiment with Basic Gray ink. Adhere Whisper White card stock over Highland Heather card stock.
This card also would be great for a birthday, Mother's Day . . . or just because! Hope you enjoy!
Cathy ;D
As promised in my first ghosting technique article posted on April 13, I'm bringing you today a second ghosting technique. This one is also very easy . . . actually only two steps!
NOTE: Solid or shaded images work best for this technique, but you also could try outline stamps to see how it looks. Sentiments with big, bold letters also work well for this technique.
Technique: Ghosting 2
Step 1: Use Whisper White Craft Stampin' Pad to stamp image on color card stock.
Step 2: When dry, use any color to stamp same image over first image, offsetting slightly above, below, or off to the side.
 |
| Click on image for closer look. |
That's it! Couldn't be much easier! So here's my sample.
 |
| Click on image for closer look. |
Materials
Stamp Sets
* First Frost (flowers)
* Peaceful Moments** (sentiment)
Paper
* Gorgeous Grape card stock (8-1/2" x 5-1/2"; 5-1/4" x 2")
* Whisper White card stock (5-1/4" x 4"; about 5-1/16" x 1" for braid punch; about 2-1/4" x 1-1/2" for sentiment; scraps for flowers)
* Highland Heather card stock (5-1/15" x 3-13/16")
* Soft Sea Foam card stock (scraps for leaf punch)
* Silver Foil (scraps for sprigs)
Inside
* Highland Heather card stock (5-1/4" x 4")
* Whisper White card stock (5-1/16" x 3-13/16")
Ink
* Craft Stampin' Pad and Whisper White Refill Ink
* Highland Heather Classic Stampin' Pad
* Gorgeous Grape Classic Stampin' Pad
* Basic Gray Classic Stampin' Pad
* Smoky Slate Classic Stampin' Pad
Other Stuff
* Layered Leaves 3D Embossing Folder
* Braided Border Punch**
* Detailed Peacock Dies
* Leaf Punch
* Ornate Frames Dies***
* Wink of Stella Glitter Brush
* Stampin' Sponge (cut into fourths for easier handling)
* Adhesives: SNAIL Adhesive; Stampin' Dimensionals; Tombow Liquid Glue
** January-June 2020 Catalog
*** 2019 Holiday Catalog carryover item
Assembly
(Unless otherwise indicated, SNAIL Adhesive used to assemble card)
1. Score 8-1/2" x 5-1/2" Gorgeous Grape card stock at 4-1/4"; fold away from score line to create card base.
2. Adhere 5-1/4" x 4" Whisper White card stock to card front.
3. On 5-1/16" x 3-13/16" Highland Heather card stock, use Whisper White Craft ink to stamp flowers randomly. Allow a few minutes to dry.
4. Use Highland Heather Ink to stamp same flower images over Whisper White images, but offset slightly (about 1/8") to the upper left.
4a. Optional Step: Use Layered Leaves 3D Embossing Folder to add texture to stamped card stock.
4b. Adhere Highland Heather card stock to front of card over Whisper White card stock.
5. Adhere 5-1/16" x 2" strip of Gorgeous Grape card stock vertically about 3/4" from left edge of Highland Heather card stock.
6. Use Braided Border Punch to cut a 5-1/16" strip from Whisper White card stock. Apply Wink of Stella to braid shape; use small dots of liquid glue to adhere to center of Gorgeous Grape 2" wide card stock.
7. Assemble focal piece:
7a. Use Leaf Punch to punch two sets of leaves from Soft Sea Foam card stock.
7b. Use Detailed Peacock Dies to cut three or four sprigs from Silver Foil.
7c. Use Gorgeous Grape ink to stamp two large flowers and one small flower on scraps of Whisper White card stock. Cut out flowers.
7d. Assemble the center section with Liquid Glue, layering as follows:
- Bottom layer: Silver sprigs
- Next layer: Soft Sea Foam leaves
- Next layer: Large flowers
- Top Layer: Small flower (attach over two large flowers with Stampin' Dimensionals)
Don't forget the inside!
 |
| Click on image for closer look. |
Adhere Highland Heather 5-1/4" x 4" card stock to inside of card.
Use Smoky Slate ink to stamp spray on 5-1/16" x 3-13/16" Whisper White card stock; stamp and cut out another large flower (see step 7c above) and adhere over spray. Stamp sentiment with Basic Gray ink. Adhere Whisper White card stock over Highland Heather card stock.
This card also would be great for a birthday, Mother's Day . . . or just because! Hope you enjoy!
Cathy ;D


Subscribe to:
Posts (Atom)