Wednesday, July 22, 2020

More New Card Designs (Stamp Camp North 7/2020)

These awesome cards are from Juli Whitfield's July Stamp Camp North!  Some wonderful designs in this batch.  I hope you enjoy.

Click on the images for closer look.


Cathy  ;D

Great Card Ideas (June 2020 Rose Hill Card Kits To Go)

Below are the cards that were included in the Rose Hill June 2020 Card Kits To Go.  Some really fun ideas here!  

Click on the images for closer look.


Enjoy and be inspired!!!

(NOTE:  Directions for all cards can be found on the Rose Hill Stamp Camp Facebook Group Page.  If you do not have access to that page, please contact me so I can send you an invitation.)

Cathy  ;D

Tuesday, July 21, 2020

Tri-Fold Pocket Card To Use Up Extra DSP

Today I'm sharing another idea for using up old Designer Series Paper ("DSP").  This tri-fold pocket card is the perfect presentation for gift cards, photos or other small items . . . and it uses up an entire sheet of 12” x 12” paper!

Click on photo for closer look.

Many thanks to Melissa Tennison for this great idea!  See Melissa’s original card, measurements, and a link to some very good instructional videos at https://mkre8tions.com/2020/04/11/april-iss-blog-hop-anything-goes/ (part 1, basic assembly) and https://mkre8tions.com/2020/04/12/april-2020-kre8tors-blog-hop-spring/ (part 2, embellishing).

Materials for sample shown above

Stamp Sets
* Harvest Hellos (large pumpkin, stem, leaves & vines)
* Gather Together (small pumpkins)
* Peaceful Moments (inside sentiment)
* Daisy Lane (outside sentiment)

Paper
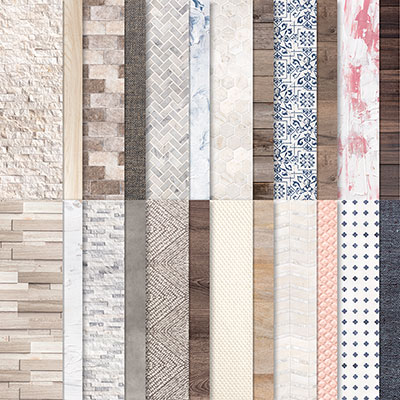
* Come To Gather 12” x 12” Designer Series Paper (“DSP”) (2019 Holiday Mini Catalog)
* Pretty Peacock card stock (5-3/4” x 2-3/4” – front and first inside panel; 2-3/4” x 2” – 2nd, 3rd, and 4th inside panels)
* Whisper White card stock (5-1/2” x 2-1/2” (5 pieces – 1 for front + 1 for each inside panel); 5-1/2” x 2” (3 pieces – 1 for each tag); scraps for punches, pumpkins & leaves

Ink
* Pretty Peacock Classic Stampin’ Pad
* Pretty Peacock Stampin’ Write Marker
* Mint Macaron Stampin’ Write Marker

Punches
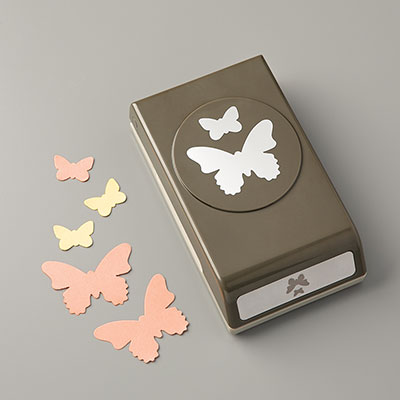
* 1” Circle (retired; 1-1/2” Circle Punch could be substituted)
* Label Me Lovely (front panel)
* Timeless Label (1st inside panel)
* Everyday Label (2nd inside panel)
* Story Label (3rd inside panel)
* Scallop Tag Topper (3 tags)
* Detailed Trio Punch (corner rounder for bottom of tags)
* Apple Builder (large pumpkins, stems and small leaves)

Other
* 3/16” Braided Linen Trim (3 pieces about 5” for tags; about 24” to wrap around card and tie bow)
* Adhesives: Multipurpose Liquid Glue; Stampin’ Seal, Tear & Tape

Assembly

1. Score 12” x 12” DSP at 6” (top to bottom).  Turn 90 degrees and score at 3” (top to bottom); score at 6” and 9” from top to first score line (6”) (see Figure 1).

2. Cut off and set aside 3” x 9” area from bottom of DSP (see Figure 1).

Figure 1

3. Fold paper up at 6” score line (see Figure 2), but do not adhere yet.  Use edge of folded paper as a guide to adhere 3” x 9” piece to inside of DSP as shown in Figure 2.

Figure 2

4. Fold along score lines accordion-style; use bone folder to smooth out and make creases nice and crisp.  Note:  If you watch the video, you will see that the accordion fold on Melissa’s card is the opposite of this sample.  Her card leaves a pocket exposed on the back when it’s closed, but I wanted all the pockets to be on the inside so the contents would be secure when the card was closed.

5. Unfold and adhere 5-1/5” x 2-1/2” Whisper White card stock to inside of panels 2, 3 and 4 over 3” x 9” DSP.  Use 1” Circle Punch to cut out notches at center of each pocket.  Apply adhesive to inside of 1st panel; apply Tear & Tape vertically along score lines and also along right edge of paper below 3” x 9” DSP; fold paper back up at 6” score line and adhere to top to create pockets.

Your basic Tri-Fold Pocket Card is now finished!  Everything beyond this point is embellishment.

6. Adhere one piece of 2-3/4” x 2-1/2” Pretty Peacock card stock over each pocket.  Punch out labels and adhere over Pretty Peacock card stock.  Stamp vines as shown.  Use Pretty Peacock ink to stamp small pumpkins on scrap of Whisper White card stock.  Color with Mint Macaron marker, cut out and adhere to labels.

7. Adhere 5-3/4” x 2-3/4” Pretty Peacock card stock to first panel.  Adhere 5-1/2” x 2-1/2” Whisper White card stock over Pretty Peacock card stock.  Stamp sentiment and vines as shown.  Stamp large pumpkin, stem and leaves on scrap of Whisper White card stock.  Color with Mint Macaron marker.  Punch out stem and pumpkin with Apple Builder Punch. use Paper Snips to cut out leaves.  Adhere to panel as shown.

8. Make three tags as follows:  Use Tag Topper Punch to trim one end of 5-1/2” x 2” Whisper White card stock; trim bottom corners with Detailed Trio Punch.  Stamp row of leaves across top and bottom of tag and color with Mint Macaron marker.  Use Pretty Peacock marker to trace a thin line around edge of tag.  Thread Linen Trim through hole at top of tag and insert tag into pocket.

9. Cut about 24” of Linen Trim.  Lay trim horizontally across front of card and adhere center to card front.

10. Adhere 5-3/4” x 2-3/4” Pretty Peacock card stock to front of card over linen trim.  Adhere 5-1/2” x 2-1/2” Whisper White card stock over Pretty Peacock card stock.  Stamp “Friend” on scrap of Whisper White card stock.  Punch out with Label Me Lovely punch and trace around edge with Pretty Peacock Stampin’ Write Marker.  Adhere to card.  Stamp vines as shown below label.

11. Stamp pumpkins, stem and leaves on scrap of Whisper White card stock, and color with Mint Macaron marker.  Punch out leaves, stem and large pumpkin with Apple Builder Punch; use Paper Snips to cut out smaller pumpkins.  Adhere as shown to front of card.  Wrap Linen Trim around card from front to back and then back around to the front.  Fasten with a bow on front of card.

Be sure to watch Melissa Tennison’s video tutorial (link provided above) for a quick visual of how the basic card is made (it's a lot easier to make than it sounds from the instructions above).  Then pull out your old DSP and go crazy making these cute cards!

Cathy  ;D

Saturday, July 11, 2020

Summer Song Card (Stamp Camp North July 2020)

Today I'm sharing with you my card for Stamp Camp North (July 2020).  I had great fun creating this card . . . and this time it actually came out pretty much as I had planned it!  (Often when I'm designing cards, the final design doesn't even slightly resemble the original idea!)


Click on image for closer look.

The card shown above uses Come To Gather DSP from  the 2019 Holiday Mini Catalog.  The photo below shows three different versions, all using In Good Taste DSP from current annual catalog.

Click on photo for closer look.

Materials

Paper:
* Seaside Spray card stock (8-12” x 5-12”; 2-1/2” x 1-1/4”)
* Whisper White card stock (5-1/4” x 4”; 2-1/4” x 1”)
* Designer Series Paper (“DSP”) (5” x 3-3/4”)
* Gray Granite card stock (3-3/4” x 2” for die cut)
* Vellum card stock (scraps for butterflies)
Inside: Gray Granite (5-1/4” x 4”); Whisper White (5: x 3-3/4*)

Other:
* Butterfly Duet Punch
* 1/16" Handheld Punch (retired Stampin' Up! item)**
* Small Brad (retired Stampin’ Up! item)
* Friendly Silhouettes Dies
* Linen Thread (4”)
* Shimmery Crystal Effects (bodies of butterflies on front of card)
* Adhesives: SNAIL Adhesive; Stampin’ Dimensionals or Foam Tape (for front sentiment); Liquid Glue (for butterflies and weeds)

** If you have a Take Your Pick Tool or a Paper Piercing Tool, they also will work well to make these small holes.

NOTE: Front and inside sentiments are computer-generated.  

Assembly:
(I'm still using up my stash of SNAIL Adhesive to assemble cards.  Since this is no longer a current Stampin' Up! product, the new product that has replaced SNAIL -- Stampin' Seal -- appears below in the product list.)

1. Score 8-1/2" x 5-1/2" Seaside Spray card stock at 4-1/4"; fold away from score line to create card.

2. Center and adhere DSP on 5-1/4" x 4" Whisper White card stock.  Use 1/16" punch** to punch a hole through both thicknesses about 1-1/4" from left edge and 5/8" from top edge of card stock.  Insert brad and pull apart prongs on the back -- do not tighten brad until Step 4 below.

3. Stamp or create your own sentiment on 2-1/4" x 1" Whisper White card stock.  Adhere to 2-1/2" x 1-1/2" Seaside Spray card stock.  Use 1-1/6" punch** to poke holes about 1/8" in from the two top corners of Seaside Spray card stock.  Thread one end of linen thread through hole from back to front and tie a loose knot near end of thread; repeat with other end of thread in opposite corner.  Gently pull up center of thread to create a hanger.  Attach Stampin' Dimensionals or Foam Tape to the back of the card stock.

4. Slip linen thread hanger over the brad and pull down gently so it is positioned behind the brad.  Use a bone folder or other flat tool to flatten out the prongs of the brad on the back of the card stock.  This will tighten up the brad and secure the thread hanger on the front.  Remove backing from Stampin' Dimensionals or Foam Tape and attach sentiment.  Adhere card stock to front of card.

5. Use Friendly Silhouette die to cut weeds from 3-3/4" x 2" Gray Granite card stock.  Adhere at bottom edge of DSP with Liquid Glue.

6. Punch three small butterflies from Vellum card stock.  Draw a thin line down the center of each butterfly with Shimmery Crystal Effects.  Allow to dry completely.  Fold back wings and adhere to card with a thin line of Liquid Glue down the center.

Don't forget the inside!

Click on image for closer look.

7. Adhere 5-1/4” x 4” Gray Granite card stock to inside of card.
8. Stamp or create your own greeting and adhere 5” x 3-3/4" Whisper White card stock over Gray Granite card stock.
9. Punch three more small butterflies from Vellum card stock and adhere as shown with Liquid Glue. 

(NOTE RE ATTACHING VELLUM:  It's hard to find adhesives that don't show through vellum card stock.  For these small butterflies, I used a thin line of Shimmery Crystal Effects to attach the butterflies to the inside of card and was pleased to see that it didn't show through the vellum at all!  On the front I used regular Liquid Glue to adhere the butterflies -- that glue didn't show through the vellum because it was hidden behind the Shimmery Crystal Effects centers.)

That's it!  Now you can sit back and relax while you enjoy your summer butterflies!

Cathy  ;D


Saturday, July 4, 2020

Happy 4th of July!!!

Cheers to a fun and safe 4th of July!  Today I'm sharing a card with you that was originally created for a some classes I taught back in June 2019.  Even at the time many of the materials used were retired, but you may be able to raid your stash of card making supplies to find these or similar items.

Click on image for closer look.

Materials

Paper
* Poppy Parade card stock (8-1/2" x 5-1/2", scored at 4-1/4"; about 2" x 5" for wavy stripes; scraps for stars)
* Blueberry Bushel card stock (5-1/4" x 4"; about 2" x 5" for wavy stripes; scraps for stars)**
* Whisper White card stock (5" x 3-3/4")
* Dazzling Diamonds Glimmer Paper (small amount for smallest stars)**
* Real Red Glimmer Paper (about 1-1/2" x 4" for celebrate)**
NOTE: I recently made a kit for a friend using Real Red and Night of Navy card stock, and it also looked great!

Other Stuff
* Swirly Scribbles Thinlits Dies (141497)**
* Celebrats You Thinlits Dies (146840)**
* Various sizes of star punches from my stash

** Indicates Stampin' Up! retired items

Notes re Assembly

This card is pretty easy to assemble just by looking at the picture, but I've added a few helpful tips below . . . .

1. The two wavy stripes were cut a little longer than the white card stock, and then the edges were trimmed before adhering to the blue card stock.

2. Tiny dots of liquid glue were used to adhere the stripes (first the blue, and then the red).  Liquid glue also was used to adhere "celebrate."

3. The stars were assembled before adding to the card.  Liquid glue was used to adhere the two outside stars; the center star was popped up with Stampin' Dimensionals.

I hope you enjoy this card -- it's a great design to celebrate any patriotic holiday.

Cathy  ;D