Yesterday my husband and I celebrated 40 years of blissful togetherness. Seriously?!
This is the card I made for him -- based heavily on a creation posted online from a recent Stampin' Up! conference in Orlando.
 |
| Click on photo for closer look. |
DISCLAIMER: Since this was a card for my own personal use and not one that I plan to do in a class, I have used a couple of retired Stampin' Up! punches and one retired Stampin' Pad.
Materials
Stamp Sets
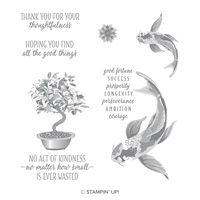
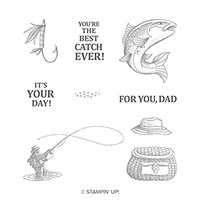
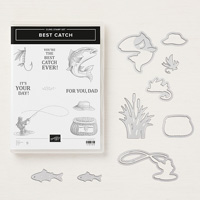
* Best Catch
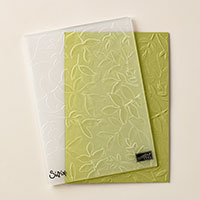
* Crackle Paint (background)
Paper
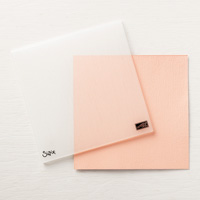
* Early Espresso card stock (8-1/2" x 5-1/2"; scrap for circle punch)
* Crumb Cake card stock (5-1/4" x 4")
* Mellow Moss card stock (scraps for weeds and circle die)
* Old Olive card stock (scrap for weeds)
* Very Vanilla card stock (scraps for dies and punch)
Ink
* Mellow Moss Classic Stampin' Pad
* Old Olive Classic Stampin' Pad
* Daffodil Delight Classic Stampin' Pad
* Calypso Coral Classic Stampin' Pad
* Sahara Sand Classic Stampin' Pad
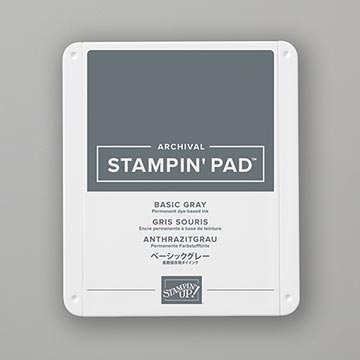
* Basic Gray Stampin' Pad
* Early Espresso Stampin' Write Marker
* Black Journaling Pen
Accessories and Tools
* Big Shot Die Cutting Machine
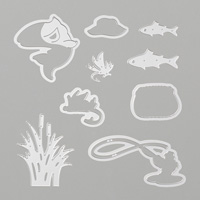
* Catch of the Day Thinlits Dies
* Layering Circles Framelits Dies
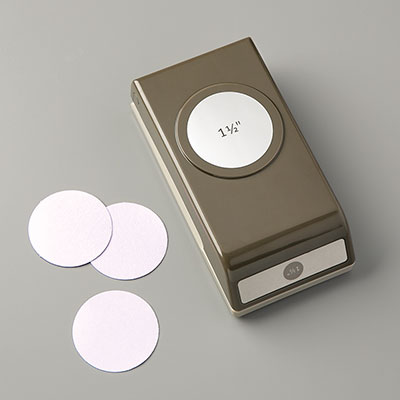
* 1-1/2" Circle Punch
* Designer Label Punch (retired)
* Linen Thread
* 5/8" Burlap Ribbon
* Stampin' Sponge
* Bone Folder
* Paper Snips
* Adhesives: SNAIL Adhesive, Stampin' Dimensionals; Multipurpose Liquid Glue; Tear 'n Tape
Other Items
* Kraft Handle Bag
* Cotton Swabs (Q-tips)
Instructions
1. Score 8-1/2" x 5-1/2" Early Espresso card stock at 4-1/4"; fold away from score line to create card.
2. Use Crumb Cake ink to stamp Crackle Paint background lightly on 5-1/4" x 4" Crumb Cake card stock.
(NOTE: Lay stamp face up on table and apply ink; then place card stock on stamp and lightly touch random areas with fingertips, rather than rubbing across entire stamp. This will create the "hit or miss" look for the background on this card.)
3. Scrape edge of scissors blade along all edges of Crumb Cake card stock to roughen them up. Use Bone Folder to curl corners of card stock. Use SNAIL Adhesive to adhere to card front.
(NOTE: Use Bone Folder like you would use scissors when curling ribbon, curling alternately from front to back until paper starts to become pliable and separate into layers -- this may require several passes. Then shape and curl edges with your fingers.)
4. Use Big Shot and Dies to cut three weed shapes -- one from Mellow Moss card stock, one from Old Olive card stock, and just the top part from Early Espresso card stock. Use Early Espresso marker to color tops of cattails on Mellow Moss weed, and then use liquid glue to adhere to front of card as shown.
5. Cut 4" length of Burlap Ribbon; pull out edges at each end and then trim individual threads to give the ends an uneven and worn look. Adhere across card over weeds with Tear 'n Tape.
6. Cut tops of cattails from Early Espresso weeds and use Liquid Glue to adhere them to tops of Old Olive weeds. Apply Stampin' Dimensionals to back at top and bottom and adhere to card over ribbon.
(NOTE: Cut thin strips of Dimensionals to adhere behind cattails and upper parts of weeds.)
7. Remove handle from bag; cut three pieces approximately 2-1/4" to 2-1/2" in length; bundle the pieces together, wrap linen thread around several times and tie in a knot in the front. Adhere to card with Liquid Glue at the weeds end and Stampin' Dimensionals at opposite end.
8. Use Basic Gray ink to stamp fish on Very Vanilla card stock; use Q-tip and Stampin' Pads to apply color. Adhere to card between front and back weeds with Stampin' Dimensionals.
(NOTE: To make the rainbow trout pictured, start with Mellow Moss at the top; then Old Olive; then Daffodil Delight; and then Calypso Coral. Underbelly is lightly colored with Sahara Sand. Fins are Mossy Meadow near body; Old Olive near tips. Use Journaling Pen to trace over eye after coloring to make it stand out.)
9. Punch 1-1/2" Circle from Mellow Moss card stock; use Big Shot and Layering Circles Die to cut 1-3/8" circle from Early Espresso card stock. Use Basic Gray ink to stamp sentiment on Very Vanilla card stock. Punch out sentiment and use Stampin' Sponge to apply Early Espresso ink to edges. Use SNAIL Adhesive or Liquid Glue to layer these pieces, and then adhere to front of card with Stampin' Dimensionals.
(NOTE: The punch I used for this sentiment is now retired, but you can use any punch you have in your stash. I would have centered it better from top to bottom, but I originally had planned to attach a fishing fly at the bottom -- when I added the fly it didn't look quite right, so I left it off. I would have stamped and punched it again to center it, but I had already loaned my stamp set to a friend, so I just went with it.)
Inside
With a card like this, you really need to finish the inside as well, so here's what I did on mine.
Additional Materials
* High Tide stamp set; Petal Palette stamp set
* Very Vanilla card stock (5-1/4" x 4"; 2" x 2")
* Copper Foil Sheet
* Baked Brown Sugar Classic Stampin' Pad (retired)
* Pear Pizzazz Classic Stampin' Pad
* Real Red Classic Stampin' Pad
* Angled Tag Topper Punch (retired)
1. Stamp fisherman image (Best Catch) as shown with Pear Pizzazz ink.
2. Stamp weeds images (High Tide) with Pear Pizzazz ink; use Black Journaling pen to lightly draw lines defining edge of hill in foreground.
3. Stamp creel and hat on Very Vanilla card stock with Basic Gray ink. Color with Baked Brown Sugar, Old Olive and Real Red ink using a Q-tip. Use Liquid Glue to adhere to card stock as shown.
4. Use Angled Tag Topper Punch to cut one edge of 2" x 2" Very Vanilla card stock. Stamp sentiment (Petal Palette) with Early Espresso ink. Use Stampin' Sponge to apply Early Espresso Ink to edges of tag. Cut 3 pieces of Linen Thread about 3" in length; hold together and thread through hole in tag; tie in a knot. Adhere to card with SNAIL Adhesive.
5. Use Big Shot to cut fishing fly from scrap of Copper Foil. Adhere to tag with Liquid Glue.
My husband and I are both fly fishing enthusiasts (whenever we can find the time, that is), so he really liked this card. Cheers to another 40 years (of course, by then he will be 111 and I will be 107, so . . . hmmmm . . . maybe not?!)
Enjoy!
Cathy ;D