 |
| Click on image for closer look. |
Materials
Stamp Sets
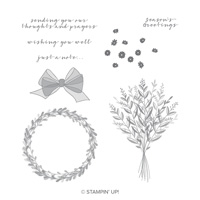
* Wishing You Well
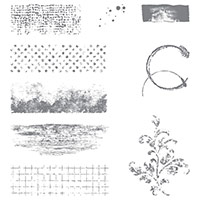
* Burlap Background
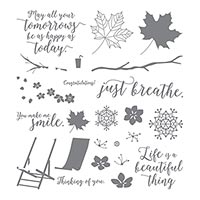
* Colorful Season
* Holly Berry Happiness (retired)
* Timeless Textures (inside)
Paper
* Mossy Meadow card stock (8-1/2" x 5-1/2")
* Cherry Cobbler card stock (5" x 3-3/4"; 3" x 3"; 3-1/4" x 1" for banner border; 5-1/4" x 4" for inside of card)
* Crumb Cake card stock (4-3/4" x 3-1/2")
* Very Vanilla card stock (2-3/4" x 2-3/4"; 3-1/4" x 1" for inside of banner; 5" x 3-3/4" for inside of card)
Ink
* Cherry Cobbler Classic Stampin' Pad
* Crumb Cake Classic Stampin' Pad
* Mossy Meadow Classic Stampin' Pad
* Soft Suede Classic Stampin' Pad
* Tuxedo Black Memento Pad
Accessories and Tools
* Big Shot Die Cutting Machine
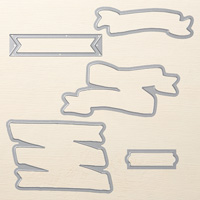
* Bunch of Banners Framelits Dies
* Subtle Embossing Folder
* Gold Metallic Thread
* Linen Thread
* Gold Metallic Pearls
* Stampin' Sponge
* Adhesives: SNAIL Adhesive; Stampin' Dimensionals; Glue Dots
Instructions
(Unless otherwise indicated, SNAIL Adhesive used to assemble card.)
1. Score 8-1/2" x 5-1/2" Mossy Meadow card stock at 4-1/4"; fold away from score line to create card.
2. Adhere 5" x 3-3/4" Cherry Cobbler card stock to front of card.
3. Use Big Shot and embossing folder to add texture to Crumb Cake 4-3/4" x 3-1/2" card stock; use stampin' sponge to apply Crumb Cake ink around edges of card stock; adhere to front of card over Cherry Cobbler card stock.
4. Use Mossy Meadow ink to stamp wreath (Wishing You Well) on 2-3/4" x 2-3/4" Very Vanilla card stock. Use Cherry Cobbler to stamp bow (Wishing You Well) as shown. Use Cherry Cobbler to stamp red accents (Colorful Season) randomly on wreath.
5. Apply Crumb Cake ink to Burlap background stamp; lay card stock from Step 4 above face down on stamp and lightly touch with fingertips here and there to get random images of stamp. Adhere card stock to 3" x 3" Cherry Cobbler card stock. Adhere Cherry Cobbler card stock to front of card as shown with Stampin' Dimensionals. Attach Gold Metallic Pearls to wreath as shown. Holding Linen Thread and Metallic Thread together, make loopy bow and attach over stamped bow with a Glue Dot behind the knot.
6. Use Memento ink to stamp Season's Greetings (Wishing You Well) in center of Very Vanilla 3-1/4" x 1" card stock. Place this piece over 3-1/4" x 1" Cherry Cobbler card stock, and use Big Shot and Banner Die to cut through both thicknesses, centering sentiment in die. NOTE: This die will cut both the inner and outer part of the banner at the same time. Discard outer piece of Very Vanilla and inner piece of Cherry Cobbler card stock. Use Stampin' Dimensionals to adhere Very Vanilla sentiment and Cherry Cobbler outer layer to front of card as shown. (Yes, I know this sounds very confusing, but when you use the die you'll see what I mean.)
 |
| Click on image for closer look. |
7. Adhere 5-1/4" x 4" Cherry Cobbler card stock to inside of card. Use the "rough edge" image from Timeless Textures and Crumb Cake ink to add border to Very Vanilla 5" x 3-3/4" card stock. Use Cherry Cobbler ink to stamp accent (Colorful Seasons) in corners. Use Soft Suede ink to stamp sentiment (Holly Berry Happiness). Adhere over Cherry Cobbler card stock.
That's it -- you're finished. The deep mossy and cherry colors make this a very rich-looking card for someone special on your Christmas card list!
Cathy ;D


No comments:
Post a Comment