 |
| Click on photo for closer look. |
The first card I chose for this year's countdown can actually be used for either Christmas or Hanukkah. It was inspired by a card I saw on Pinterest (pinned by Jo Ann
Usey, JGU Card Creations). Only the basic design of the original card remains -- I've changed the colors, the background, and most of the elements. What attracted me to this design were the candles. View a picture below of the card that inspired me to make this one.
Materials
Paper
- · Smoky Slate card stock (8-1/2” x 5-1/2”, scored at 4-1/4”; 3-1/2” x 1” for candle on left)
- · Night of Navy card stock (5-1/4” x 4”; about 1-1/2” x 3-3/4” for celebrate die)
- · Whisper White card stock (5” x 3-3/4”)
- · Shimmery White card stock (3” x 1” for candle on right)
- · Vellum card stock (1” x 3-3/4”)
- · Gold Foil (about 1” x 1-1/2” for flames)
- · Silver Foil (about 2” x 2” for sprigs)
- · Sparkle Glimmer Paper (about 1-1/2” x 2” for sprays)
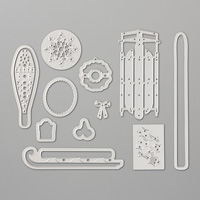
- · Big Shot Die Cutting Machine
- · Pretty Pines Thinlits Dies (silver sprigs and white glimmer sprays)
- · Celebrate You Thinlits Dies (congratulations)
- · Lemon Builder Punch (flames and curves at tops of candles)
- · Tin Tile Dynamic Textured Impressions Embossing Folder
- · Adhesives: SNAIL Adhesive; Stampin’ Dimensionals; Tombow Liquid Glue
There’s nothing special about assembling this card – it’s just layered
up as shown. The Shimmery White candle
on the right was attached with Stampin’ Dimensionals. “Celebrate” was adhered to the strip of
Vellum card stock with liquid glue, and then a small piece of Stampin’
Dimensionals was attached at each end of the Vellum to attach it to the front
of the card, leaving the remainder of the strip unattached (the center is supported
by the Shimmery White candle). AFTER the
Vellum card stock was attached, each of the sprigs and sprays were slipped
under the Vellum and attached with dots of liquid glue behind the tips.
This is the pin that inspired me to make the card above:
 |
| Click on image for closer look. |
Cathy ;D


No comments:
Post a Comment