This page is all about having fun with paper! Find ideas and instructions for cards and other fun projects on my Home page. Click on Upcoming Events for class schedules and other upcoming events.
Wednesday, December 25, 2019
Tuesday, December 24, 2019
Day 24 - 2019 Countdown to Christmas
Here's another cute dollar store gift idea from my friend Carol Brooks. It's a magnet that's currently making my refrigerator look very festive indeed!
Materials
* Magnetic tin (about 3-3/4" wide by 1-5/8" deep, including lid)
* Thick jute twine
* Thin jute twine for hanging loop
* Mini toy truck
* Small amount of evergreen
* Styrofoam "snowballs"
* Small amount of wrapping paper for background
* Ribbon for bow
* Hot Glue
What a cute idea for a Christmas tree ornament or gift embellishment!
Thanks again, Carol! I love your creative mind!
Cathy ;D
 |
| Click on photo for closer look. |
Materials
* Magnetic tin (about 3-3/4" wide by 1-5/8" deep, including lid)
* Thick jute twine
* Thin jute twine for hanging loop
* Mini toy truck
* Small amount of evergreen
* Styrofoam "snowballs"
* Small amount of wrapping paper for background
* Ribbon for bow
* Hot Glue
What a cute idea for a Christmas tree ornament or gift embellishment!
Thanks again, Carol! I love your creative mind!
Cathy ;D
Day 23 - 2019 Countdown to Christmas
Another cute idea for gifting money . . . .

Remember the Owl Builder Punch? (I so miss it . . . .) This post will take you back to 2010 when we used the Owl Builder and Snowflake Punches to make a cute money holder card.
View my original post with complete materials list HERE.
Cathy ;D
Day 22 - 2019 Countdown to Christmas
Oh no! Christmas is almost here!!! Need some ideas for last-minute gifts?
Click HERE to see a YouTube video offering some unique and very creative ideas for gifting money!
Cathy ;D
Day 21 - 2019 Countdown to Christmas
It's getting down to the wire, so today I'm sending a link a great article entitled
How to Wrap a Gift for Christmas Like a Professional
Click HERE to visit this Country Living website to see how to make your wrapped gifts gorgeous!
Cathy
Sunday, December 22, 2019
Day 20 - 2019 Countdown to Christmas
Today's entry is a fun Christmas puzzle. (Check back in a few days for the answer key.)
Thursday, December 19, 2019
Day 19 - 2019 Countdown to Christmas
Let it snow, let it snow, let it snow!
Look what my friend Carol Brooks made for me from items she found in the local dollar store! Isn't this just the cutest winter decoration!?
 |
| Click on photo for closer look. |
Materials Used
* Pizza pan for base
* Fat quarter plaid fabric
* Thick rope
* Wired ribbon
* "Let it Snow" metal embellishment
* Lots of glue!*
Carol is one of the craftiest people I know, and she's also an avid crocheter like me. I love our Tuesday morning coffee sessions -- we get to share so many ideas! I always try to remember to take my little red notebook so I can write down all of the great crafty things we talk about.
Thanks, Carol, for this great gift!
Cathy ;D
* NOTE: I discovered that sub-freezing temps and hot glue don't necessarily get along so well. I hung this sweet decoration on my front door, and when I opened the door the next morning, the hot glue holding the jute hanging loop on the back had failed and the decoration had fallen. Carol had covered the hanger with a piece of felt and that was still there, so I hot-glued the hanger to the outside of the felt and added packaging tape to hold it. Unfortunately, the next day, the hot glue had given way again, and the felt and loop had slipped out from under the packaging tape. Fortunately, this guy is a survivor -- he was still intact except for the hanger, but the bottom of the pizza pan is now a little bent and bruised.
This morning I tried Gorilla Glue (Clear Grip Gel), and once it's cured for 24 hours, I'm planning to hang my Let it Snow decoration inside the house -- don't want to take any more chances on ruining him for good! Wish me luck!
Wednesday, December 18, 2019
Day 18 - 2019 Countdown to Christmas
This card uses many retired Stampin' Up! items, but it was one of my favorite cards to make this year. (NOTE: Since many of the classes I'm now teaching are not Stampin' Up! activities, I'm able to come up with lots of cute ideas using my retired stash.)
Materials
Stamp
* Holiday stamp set from my stash (not Stampin' Up!)
Paper
* Whisper White Thick card stock (8-1/2" x 5-1/2")
* Handsome Hunter card stock (retired) (5-1/4" x 4"; 3-3/4" x 2-1/2"; about 1-1/2" x 1" for bow)
* Red Foil (retired) (5" x 3-3/4")
* Whisper White card stock (3-1/2" x 2-1/4")
* Specialty Designer Series Paper (retired) (about 2-1/4" x 1-1/2" for candy cane)
Ink
* Black Stamp Pad
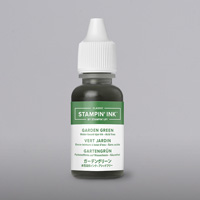
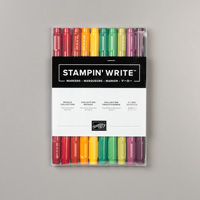
* Real Red and Garden Green Stampin' Write Markers
Other
* Candy Cane Builder Punch (retired)
* Snowflake embellishment from my stash
* Wink of Stella Glitter Brush
* Adhesives: SNAIL Adhesive; Stampimn' Dimensionals; Glue Dots
Instructions
(NOTE: SNAIL Adhesive used to assemble card unless otherwise indicated.)
1. Score 8-1/2" x 5-1/2" card stock at 4-1/4"; fold away from score line to create card base.
2. Adhere 5-1/4" x 4" Handsome Hunter card stock to card front.
3. Adhere Red Foil over Handsome Hunter card stock.
4. Stamp sentiment near bottom of 3-1/2" x 2-1/4" Whisper White card stock; adhere to 3-3/4" x 2-1/2" Handsome Hunter card stock. Attach to front of card with Stampin' Dimensionals. (NOTE: Since this stamp had a couple of ornaments on it, I painted them with the Red and Green Stampin' Write Markers.)
5. Punch candy cane from red and white striped paper; use brush end of Garden Green Stampin' Write Marker to trace around outer edge of candy cane to define the edges. Adhere candy cane to Whisper White card stock with Stampin' Dimensionals.
6. Punch bow from Handsome Hunter card stock; paint with Wink of Stella glitter brush; adhere to candy cane with Glue Dot. Adhere snowflake to bow with Glue Dot.
Finished! Another quick and easy, bright and cheerful holiday card!
Cathy ;D
 |
| Click on image for closer look. |
Materials
Stamp
* Holiday stamp set from my stash (not Stampin' Up!)
Paper
* Whisper White Thick card stock (8-1/2" x 5-1/2")
* Handsome Hunter card stock (retired) (5-1/4" x 4"; 3-3/4" x 2-1/2"; about 1-1/2" x 1" for bow)
* Red Foil (retired) (5" x 3-3/4")
* Whisper White card stock (3-1/2" x 2-1/4")
* Specialty Designer Series Paper (retired) (about 2-1/4" x 1-1/2" for candy cane)
Ink
* Black Stamp Pad
* Real Red and Garden Green Stampin' Write Markers
Other
* Candy Cane Builder Punch (retired)
* Snowflake embellishment from my stash
* Wink of Stella Glitter Brush
* Adhesives: SNAIL Adhesive; Stampimn' Dimensionals; Glue Dots
Instructions
(NOTE: SNAIL Adhesive used to assemble card unless otherwise indicated.)
1. Score 8-1/2" x 5-1/2" card stock at 4-1/4"; fold away from score line to create card base.
2. Adhere 5-1/4" x 4" Handsome Hunter card stock to card front.
3. Adhere Red Foil over Handsome Hunter card stock.
4. Stamp sentiment near bottom of 3-1/2" x 2-1/4" Whisper White card stock; adhere to 3-3/4" x 2-1/2" Handsome Hunter card stock. Attach to front of card with Stampin' Dimensionals. (NOTE: Since this stamp had a couple of ornaments on it, I painted them with the Red and Green Stampin' Write Markers.)
5. Punch candy cane from red and white striped paper; use brush end of Garden Green Stampin' Write Marker to trace around outer edge of candy cane to define the edges. Adhere candy cane to Whisper White card stock with Stampin' Dimensionals.
6. Punch bow from Handsome Hunter card stock; paint with Wink of Stella glitter brush; adhere to candy cane with Glue Dot. Adhere snowflake to bow with Glue Dot.
Finished! Another quick and easy, bright and cheerful holiday card!
Cathy ;D
Tuesday, December 17, 2019
Day 17 - 2019 Countdown to Christmas
So how do you celebrate Christmas Eve? Do you have a traditional family meal? Or do you have a casual meal while you anticipate the coming of the big day? If the latter, I have a great idea for you -- how about a special batch of chili?!
I love a good bowl of chili on a cold winter's night and, as the name of the recipe implies, this version from Martha Stewart adds a note of festiveness. It also has a very rich and satisfying flavor. (I'm usually not a Martha Stewart fan, but I couldn't resist trying this recipe . . . and it was well worth it!)
I love a good bowl of chili on a cold winter's night and, as the name of the recipe implies, this version from Martha Stewart adds a note of festiveness. It also has a very rich and satisfying flavor. (I'm usually not a Martha Stewart fan, but I couldn't resist trying this recipe . . . and it was well worth it!)
Beer
Chocolate Chili
Martha Stewart (October 9, 2014)
Beer. Chili. Chocolate. The End.
Come and get it! This chili is the real deal. Large chunks of beef
chuck steeped in spices and cooked slowly in tomatoes, beer, and a bit of
chocolate make this a truly remarkable chili. It’s getting colder out, and
recipes that fill you up and keep you warm are now in season — and this recipe
should be on your list of hearty autumn cuisine!
Usually chili is something you have to keep your eye on while on
the stove, but with a slow cooker, you can combine the ingredients and come
back to a well-cooked meal. Slow cookers can safely be left unattended as the
ingredients cook at low temperatures for long periods of time, transforming
tougher meat into wonderfully tender cuts. But because of this, you’re not
going to get your awesome chili for 6 to 7 hours. Do the prep work, toss all
the ingredients in the slow cooker, and occupy your time (we all know you’re
just going to be thinking about this chili, though).
It’s the chocolate and the beer that make this meal a major
talking point. The stout gives the chili a bite, and the chocolate cuts it
while rounding out the heat and smoke. It’s a combination made by the food gods
sent to earth for everyone to have one heck of a time!
1/4 cup chili powder
2 tablespoons whole cumin seeds
1 teaspoon cayenne
3/4 teaspoon ground cinnamon
2 teaspoons dried Mexican or regular oregano, crumbled between your fingers
3 bay leaves
2 teaspoons light or dark brown sugar
4 pounds boneless beef chuck, trimmed and cut into 1 1/2- to 2-inch cubes
1 teaspoon freshly ground black pepper
2 1/2 tablespoons kosher salt, divided
3 tablespoons vegetable oil, divided
3 medium onions, coarsely chopped (about 4 cups)
1 1/2 cups chopped celery, including leaves
6 cloves garlic, roughly chopped
2 jalapeno chilis, roughly chopped
One 12-ounce bottle dark Mexican beer, such as Negro Modelo
2 tablespoons tomato paste
One 28-ounce can crushed tomatoes
1 ounce semisweet chocolate, coarsely chopped
3 tablespoons masa harina (corn flour, not cornstarch)
1/2 cup chopped fresh cilantro leaves
1/2 cup chopped fresh parsley leaves
Grated cheddar cheese, for garnish
Chopped green onion, for garnish
Sour cream, for garnish
1. Combine the chili powder, cumin seeds, cayenne, cinnamon,
oregano, bay leaves, and brown sugar in a small bowl; set the spice mixture
aside.
2. Add the beef to a medium bowl and season with the pepper and 1
tablespoon of the kosher salt.
3. Heat 2 tablespoons of the vegetable oil in a 12-inch or larger skillet
over high heat. Add enough beef to fill the pan and cook until nicely browned
on one side, about 2 minutes. Turn the pieces over and cook for another 2
minutes. Transfer the browned beef to the crock of a 6-quart slow cooker.
Repeat with the remaining beef, adding the remaining vegetable oil between
batches as necessary.
4. Add the onions, celery, and 1 tablespoon of the remaining salt
to the skillet and cook, stirring, until the vegetables begin to soften, about
2 minutes. Add the garlic, jalapenos, and spice mixture and cook for 1 minute
longer. Pour in the beer, tomato paste, and crushed tomatoes and simmer for 3
minutes. Stir in the chocolate, masa harina, and remaining 1 1/2 teaspoons
salt and cook for 1 minute longer. Transfer this mixture to the slow cooker.
Cover and cook the chili on high, undisturbed or stirring only once during
cooking, for 6 hours, or until the beef is very tender. Remove the bay leaves
and stir in the cilantro and parsley. Serve the chili hot in bowls, topped with
grated cheddar, chopped green onion, and sour cream.
YUM-O!!! (Ok . . . this expression is totally Rachael Ray, not Martha Stewart, but I can't think of a better word to describe this recipe!) I hope you enjoy it as much as we do.
Cathy ;D
Monday, December 16, 2019
Day 16 - 2019 Countdown to Christmas
Several days ago I did something really embarrassing. I packed up for a class and was heading out the door when I realized that one set of card kits I had packed was the one we had made two weeks earlier! (They say the mind is the first thing to go, right?!)
So I quickly looked around my craft room and spotted the November Paper Pumpkin. The day was saved -- there were 5 people in the class, and 6 sets of tags in the kit.
This is what we made in place of the fourth card that day.
These are very cute tags, and I was very thankful that day that I still subscribe to Paper Pumpkin.
Cathy ;D
So I quickly looked around my craft room and spotted the November Paper Pumpkin. The day was saved -- there were 5 people in the class, and 6 sets of tags in the kit.
This is what we made in place of the fourth card that day.
 |
| Click on photo for closer look. |
These are very cute tags, and I was very thankful that day that I still subscribe to Paper Pumpkin.
Cathy ;D
Sunday, December 15, 2019
Day 15 - 2019 Countdown to Christmas
Wow! Only 10 more days 'til Christmas!
Today's project is a gift and note card holder recently made in several of my classes.
This gift card holder is made from a flat kraft envelope (4-3/4" wide x 6-1/2" tall). The bottom is folded up to create the front pocket; the back pocket is formed by the bag opening. There's no need to glue it because the belly band (12" x 2") holds everything in place.
This is actually a remake of a similar gift card holder I made a few years ago -- just a little "Christmased-up." Click HERE to view the original project.
The only materials needed for this project are the envelope, some designer paper for the belly band and contrasting paper for the poinsettia (cut with a tattered poinsettia die from my stash) . . . and a little bling for the center of the poinsettia.
This is a very fun and easy project and a great way to present a gift card or other small flat gift. Hope you enjoy it!
Cathy ;D
Today's project is a gift and note card holder recently made in several of my classes.
 |
| Click on image for closer look. |
This gift card holder is made from a flat kraft envelope (4-3/4" wide x 6-1/2" tall). The bottom is folded up to create the front pocket; the back pocket is formed by the bag opening. There's no need to glue it because the belly band (12" x 2") holds everything in place.
This is actually a remake of a similar gift card holder I made a few years ago -- just a little "Christmased-up." Click HERE to view the original project.
The only materials needed for this project are the envelope, some designer paper for the belly band and contrasting paper for the poinsettia (cut with a tattered poinsettia die from my stash) . . . and a little bling for the center of the poinsettia.
This is a very fun and easy project and a great way to present a gift card or other small flat gift. Hope you enjoy it!
Cathy ;D
Saturday, December 14, 2019
Day 14 - 2019 Countdown to Christmas
This little treat box is a great idea for a small token of appreciation or a table favor. My friend Kathy Howes made these as gifts for the stampers at a recent stamp camp.
 |
| Click on photo for closer look. |
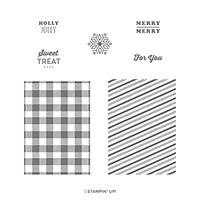
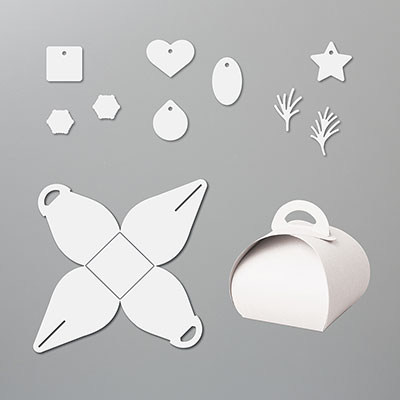
This is the sweetest and easiest little treat box. It's a mini version of the original Curvy Keepsakes Box Die. For the original box, it was necessary to cut two pieces and glue them together at the base. For this one, the box is just one piece! So all you need to do is cut it, fold it up, add a little something on the inside, add a tag (tag dies are included in set), and you're finished!!!!
Materials
Stamp Set
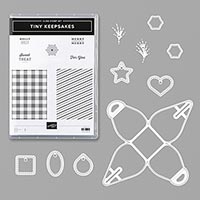
* Tiny Keepsakes (2019 Holiday Catalog)
Paper
* Whatever retired double-sided designer series paper you have in your stash (about 6" x 6")
* Whisper White card stock (about 1" x 1" for tag)
* Whisper White card stock (about 1" x 1" for tag)
Ink
* Real Red Classic Stampin' Pad
Other
* Mini Curvy Keepsakes Box Dies (2019 Holiday Catalog)
* Come to Gather Ribbon Pack (hanging string) (2019 Holiday Catalog)
Fun stuff!!!
Cathy
Day 12 - 2019 Countdown to Christmas
My Day 12 card is patterned after a card made by my friend Wanda Williams for a card swap with Stampin' Up! demonstrators. It's quick and easy and beautiful!
Materials
(NOTE: This card is made with current and retired Stampin' Up! materials.)
Stamp
* Peaceful Poinsettia (retired)
Paper
* Real Red card stock (8-1/2" x 5-1/2")
* Garden Green card stock (5" x 3-3/4"; about 3-1/2" x 2-1/2" for scalloped oval)
* Gold Foil (4-3/4" x 3-1/2")
* Whisper White card stock (about 4" x 2" for poinsettia; about 3-1/4" x 2-1/4" for oval)
Ink
* Garden Green Classic Stampin' Pad
* Garden Green Stampin' Write Marker
* Real Red Stampin' Write Marker
* Black Ink Pad
Other
* Detailed Poinsettia Dies (retired)
* Layering Ovals Dies
* Tin Tile Embossing Folder
* Clear Embossing Powder
* Heat Tool
* Round Holographic Stickers from my stash
* Adhesives: SNAIL Adhesive, Stampin' Dimensionals
Instructions
(NOTE: SNAIL Adhesive used to assemble this card unless otherwise indicated.)
1. Score 8-1/2" x 5-1/2" card stock at 4-1/4"; fold away from score line to create card base.
2. Adhere 5" x 3-3/4" Garden Green card stock to card front.
3. Use embossing folder to add texture to gold foil; adhere to Garden Green card stock.
4. Cut scalloped oval from Garden Green card stock; cut oval from Whisper White card stock. Stamp sentiment near bottom of white oval and adhere to green scalloped oval.
5. Stamp poinsettia image with black ink; quickly sprinkle clear embossing powder over image (while ink is still wet) and heat with heat tool until image is dark black and shiny. Color image with markers and adhere to oval above sentiment.
6. Use Stampin' Dimensionals to adhere oval with poinsettias to front of card.
7. Add bling to center of poinsettia. (NOTE: I used tiny round holographic stickers, but you also could use tiny rhinestones or pearls.)
That's it! Your card is finished!
Cathy ;D
 |
| Click on photo for closer look. |
Materials
(NOTE: This card is made with current and retired Stampin' Up! materials.)
Stamp
* Peaceful Poinsettia (retired)
Paper
* Real Red card stock (8-1/2" x 5-1/2")
* Garden Green card stock (5" x 3-3/4"; about 3-1/2" x 2-1/2" for scalloped oval)
* Gold Foil (4-3/4" x 3-1/2")
* Whisper White card stock (about 4" x 2" for poinsettia; about 3-1/4" x 2-1/4" for oval)
Ink
* Garden Green Classic Stampin' Pad
* Garden Green Stampin' Write Marker
* Real Red Stampin' Write Marker
* Black Ink Pad
Other
* Detailed Poinsettia Dies (retired)
* Layering Ovals Dies
* Tin Tile Embossing Folder
* Clear Embossing Powder
* Heat Tool
* Round Holographic Stickers from my stash
* Adhesives: SNAIL Adhesive, Stampin' Dimensionals
Instructions
(NOTE: SNAIL Adhesive used to assemble this card unless otherwise indicated.)
1. Score 8-1/2" x 5-1/2" card stock at 4-1/4"; fold away from score line to create card base.
2. Adhere 5" x 3-3/4" Garden Green card stock to card front.
3. Use embossing folder to add texture to gold foil; adhere to Garden Green card stock.
4. Cut scalloped oval from Garden Green card stock; cut oval from Whisper White card stock. Stamp sentiment near bottom of white oval and adhere to green scalloped oval.
5. Stamp poinsettia image with black ink; quickly sprinkle clear embossing powder over image (while ink is still wet) and heat with heat tool until image is dark black and shiny. Color image with markers and adhere to oval above sentiment.
6. Use Stampin' Dimensionals to adhere oval with poinsettias to front of card.
7. Add bling to center of poinsettia. (NOTE: I used tiny round holographic stickers, but you also could use tiny rhinestones or pearls.)
That's it! Your card is finished!
Cathy ;D
Day 11 - 2019 Countdown to Christmas
We made this card at my table at Rose Hill Stamp Camp in November. Thanks to Julie Gilson for this cute design. You can view Julie's site, Stampin' Gala, to see this and other great cards by clicking HERE.
 |
| Click on image for a closer look. |
Materials
(NOTE: All materials used are Stampin' Up!, but some are retired items.)
Stamps
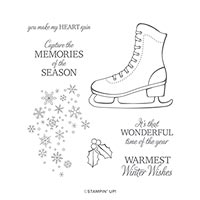
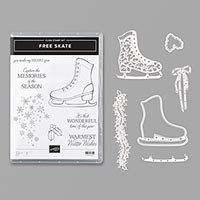
* Free Skate (2019 Holiday Catalog)
* Peaceful Poinsettia (retired, see note below)
Paper
* Pool Party card stock (8-1/2" x 5-1/2"; 5-1/8" x 3-7/8")
* Whisper White card stock (5-1/4" x 4"; 4" x 2-3/4"; scraps for holly)
* Silver Foil (4-1/8" x 2-7/8"; about 3" x 3" for skate)
Ink
* Basic Gray Stampin' Pad
* Pool Party Stampin' Write Marker
* Flirty Flamingo Stampin' Write Marker
Other
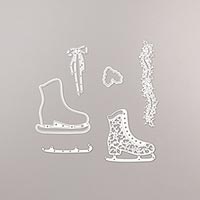
* Detailed Skate Dies (2019 Holiday Catalog)
* Detailed Poinsettia Dies (retired, see note below)
* Eyelet Lace Embossing Folder
* Silver Organdy Ribbon (retired)
* Ice Stampin' Glitter (2019 Holiday Catalog)
* Adhesives: SNAIL Adhesive; Stampin' Dimensionals; Glue Dots; Liquid Glue
Instructions
(NOTE: SNAIL Adhesive used to assemble card unless otherwise indicated)
1. Score 8-1/2" x 5-1/2" card stock at 4-1/4"; fold away from score line to create card base.
2. Adhere 5-1/4" x 4" white card stock to card front.
3. Use embossing folder to add texture to 5-1/8" x 3-7/8" Pool Party card stock. Adhere over white card stock.
4. Apply tiny dots of liquid glue randomly around outer edges of embossed card stock. Sprinkle glitter over card stock and tap off excess. Set aside to dry while completing steps 5 thru 8.
5. Adhere 4" x 2-3/4" white card stock to 4-1/8" x 2-7/8" silver foil.
6. Cut detailed skate from 3" x 3" silver foil. Adhere to white card stock with liquid glue.
7. Use Basic Gray ink to stamp holly images on scraps of white card stock; color images with Stampin' Write Markers. Cut out images with holly die and adhere to top edges of skate with liquid glue.
(NOTE: The holly image appears in both the Free Skate and Peaceful Poinsettia stamp sets; however, the one in the Skate set has only two leaves, while the one in the Poinsettia set has three leaves. The original design by Julie Gilson used the image from Free Skate, and she used two sets of leaves on each side of skate (four die cuts). Because I was cutting a bunch of these for the stamp camp, I opted to use the one with three leaves (shown above) to save prep time.)
8. Tie bow with silver ribbon (or whatever other ribbon you have on hand) and attach to top of skate with glue dot behind knot.
9. Adhere the assembled skate piece to front of card with Stampin' Dimensionals.
That's it! I hope you enjoy this card.
Cathy ;D
Subscribe to:
Comments (Atom)


