Pages

Wednesday, November 28, 2018

Autumn Leaf Card (October Stamp Camp North)

Sneaking in another fall card before beginning my Christmas countdown.  This is the card we made at my table at Stamp Camp North in October.  It looks like a lot of work, but it's actually fairly simple to make!

NOTE:  This card was intended to be a Thanksgiving card, but you can easily adapt it for birthday, get well, or any other occasion by using a different sentiment.

Click on photo for closer look.
Materials

Stamp Set
* Painted Harvest (sentiment)
* Colorful Seasons (inside)

Paper
* Cajun Craze card stock (8-1/" x 5-1/2"; about 2-1/4" x 2-1/4" for detailed leaf)
* Very Vanilla card stock (5-1/2" x 2"; 3-1/2" x 1" for banner; 5-1/4" x 4" for inside)
* Soft Suede card stock (5-1/2" x 1-3/4")
* Crumb Cake card stock (2-1/4" x 2-1/4" for circle)
* Early Espresso card stock (2" x 2" for leaf punch)

Ink
* Early Espresso Classic Stampin' Pad
* Soft Suede Classic Stampin' Pad

Accessories and Tools
* Big Shot Die Cutting Machine
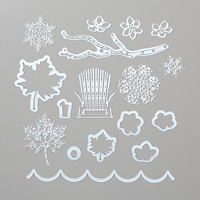
* Seasonal Layers Framelits Dies (detailed leaf)
* Lakeside Framelits Dies (banner)
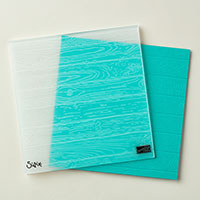
* Pinewood Planks Embossing Folder
* Corrugated Dynamic Embossing Folder
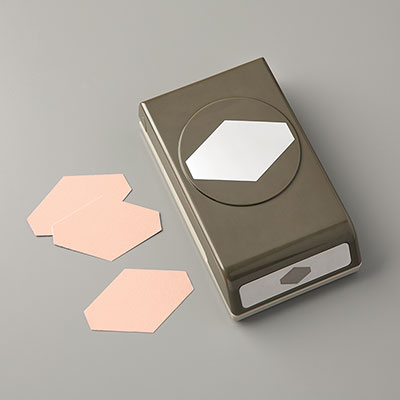
* Leaf Punch
* 2-1/4" Circle Punch
* Linen Thread
* 1/4" Copper Trim (about 1-1/2")
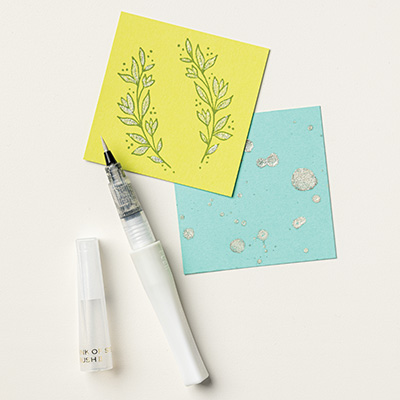
* Wink of Stella (clear)
* Stampin' Sponge
* Adhesives (SNAIL Adhesive; Stampin' Dimensionals; Glue Dots; Tombow Liquid Glue)

Instructions
(NOTE: SNAIL Adhesive used to assemble card unless otherwise indicated)

1. Score 8-1/2" x 5-1/2" Cajun Craze card stock at 4-1/4"; fold away from score line to create card.

2. Using Big Shot and Pinewood Planks Embossing Folder, emboss just the front panel of the card.

3. Use Stampin' Sponge and Soft Suede ink to sponge ink around edges of 5-1/2" x 2" Very Vanilla card stock.  Adhere to front of card as shown.

4. Adhere Soft Suede 5-1/2" x 1-3/4" card stock over Very Vanilla card stock.

5. Use Early Espresso ink to stamp sentiment on Very Vanilla card stock; cut out image with banner die; apply Soft Suede ink around edges with Stampin' Sponge.  Adhere to card as shown.

6. Punch circle from Crumb Cake card stock; use Big Shot and Corrugated Embossing Folder to add texture; sponge Soft Suede Ink around edges with Stampin' Sponge.  Set aside until Step 9 below.

7. Use Big Shot and Seasonal Layers Framelits Die to cut detailed maple leaf from Cajun Craze card stock.  Apply Wink of Stella clear glitter.  Set aside until Step 9 below.

8. Use Leaf Punch to cut leaves from Early Espresso card stock.  Apply Wink of Stella clear glitter.  See Step 9 below for assembly.

9. Assemble focal piece as follows
 * Use a few small dots of Liquid Glue to adhere Early Espresso leaves to Crumb Cake circle.
 * Adhere Detailed Leaf over Early Espresso leaves with a few tiny drops of Liquid Glue.
 * Make a 3-loop bow about 2" wide.  Tie Copper Trim around center of bow and pull out edges of trim to create a "meshy" look.  Adhere over stem of Detailed Leaf with a Glue Dot behind knot.
 * Adhere Circle to card with Stampin' Dimensionals.

Click on photo for closer look.

For the inside piece, use Stampin' Sponge to apply Soft Suede ink around edges of 5-1/4" x 4" Very Vanilla card stock and then stamp a few leaves from Colorful Seasons using Cajun Craze ink.  To make various shades of the small solid leaves, ink up the stamp and then stamp several leaves before re-inking.

Hope you enjoy this card!

Cathy  ;D


Saturday, November 24, 2018

Another Fall Card (Stamp Camp North 9/2018)

Seems like I'm forever trying to catch up . . . and sadly my blog is usually what suffers most!  I want to try to fit in a few more fall cards before my Christmas Countdown begins on December 1.  We made this card at my table at Stamp Camp North way back in September.

My inspiration for this card came from Stampin' Up! demonstrator Penni Behr, whose card was very similar, but with fewer layers.

Click on image for closer look.

Materials

Stamp Set
* Rooted in Nature

Paper
* Pumpkin Pie card stock (8-1/2" x 5-1/2")
* Early Espresso card stock (5-1/4" x 4"; 5" x 1-5/8"; scrap for leaf punch)
* Very Vanilla card stock (5" x 3-3/4")
* Glossy White card stock (5" x 1-1/2")

Ink
* Early Espresso Classic Stampin' Pad
* Pumpkin Pie Classic Stampin' Pad
* Soft Suede Classic Stampin' Pad

Accessories and Tools
* Leaf Punch
* Gold Metallic Thread (about 12")
* 5/8" Burlap Ribbon (3-3/4")
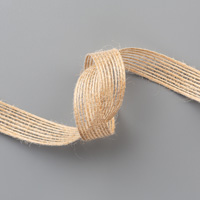
* 1/4" Copper Trim (about 1-1/2" to 2")
* Leaves Trinkets
* Wink of Stella (Clear)
* Stampin' Sponge 
* Adhesives:  SNAIL Adhesive; Glue Dots

Instructions
(NOTE:  SNAIL Adhesive used throughout assembly unless otherwise indicated.)

1. Score Pumpkin Pie 8-1/2" x 5-1/2" card stock at 4-1/4"; fold away from score line to create card base.

2. Adhere 5-1/4" x 4" Early Espresso card stock to front of card.  Set aside until Step 5 below.

3. On 5" x 1-1/2" Glossy White card stock, sponge Pumpkin Pie ink from top to center of card stock; repeat with Soft Suede ink, starting at the bottom and moving up and overlapping Pumpkin Pie ink to blend in and soften the break between colors.  (NOTE:  I cut my Stampin' Sponges into fourths for sponging -- makes them much easier to handle.)

4. Place (but DO NOT GLUE) Glossy White card stock over Very Vanilla card stock, positioning it about 1" from left edge.  Use Early Espresso ink to stamp tree image as shown.  (NOTE:  There will be a gap in the image between the two pieces of card stock; not to worry -- we will take care of that in the next step.)

5. Remove Glossy White card stock and adhere it to 5" x 1-5/8" Early Espresso card stock.  Lining up image to cover gap, adhere Early Espresso card stock to Very Vanilla card stock as shown.  Adhere Very Vanilla card stock to front of card.

6. Cut Burlap Ribbon at an angle and adhere to front of card as shown.  Wrap Gold Metallic Thread around about three fingers several times to create "messy" loop.  Holding all strands together at one side of loop, push the strands into a Glue Dot and then use the Glue Dot to adhere loop over Burlap Ribbon.  Be sure to position the Glue Dot so it will be under the Early Espresso leaves (see next step).

7. Punch leaves from Early Espresso card stock and paint with Wink of Stella.  Adhere over Burlap Ribbon and Metallic Thread as shown.

8. Attach Leaves Trinket over Early Espresso leaves with Glue Dot.

9. Tie knot in Copper Trim and pull out edges of trim to create "meshy" look.  Attach over Leaves Trinket with a Glue Dot behind the knot.

And that's it . . . except for the inside.  I wasn't sure what I would use this card for, so I simply stamped a bunch of leaves on the inside using Soft Suede ink.  I'm a big fan of handwritten notes, so unless I have a specific purpose in mind for my cards, I often leave them blank on the inside until I'm ready to use them.  (NOTE:  The leaves stamped on the inside of this card are actually from the Painted Harvest stamp set, but there's also a similar leaves image in the Rooted in Nature stamp set.)

Click on image for closer look.

Hope you enjoyed this card!  A fun technique with a great look!

Cathy  ;D

Friday, November 23, 2018

STAMPIN' UP! ONLINE EXTRAVAGANZA BEGINS TODAY!!!


Don't miss out on Stampin' Up!'s 2018 Online Extravaganza.  Thoughout the next 6 days, almost all of the items in the 2018-2019 Annual Catalog will be discounted at 10% off!!!

Visit my Current Stampin' Up! Promotions page for details, or visit my online store at http://cathyhansen.stampinup.net to place your orders while supplies last!

Cathy  ;D

Monday, November 5, 2018

November Classes in My Craft Room

Just a quick heads up that the following photo has been added to my Class Projects page.  These are the projects we'll be making in my craft room classes on November 7 and November 10.

Click on photo for closer look.

Click HERE to visit my Class Projects Page.

Click HERE to visit my Upcoming Events Page.

I hope to see you soon!

Cathy  ;D

Thursday, November 1, 2018

Snowflake Showcase Limited Time Offer


Visit my Stampin' Up! Current Promotions page for additional information about this month's promotion -- but hurry!  This is a limited time offer and will be available only while supplies last!!!

Cathy  ;D

Colorful Leaves Autumn Card

Click on image for closer look.

This card features an age-old, fun and easy technique to create the colorful leaves.

Materials

Stamp Set
All the Good Things

Paper
Cajun Craze card stock (8-1/2” x 5-1/2”, scored at 4-1/4”)
Copper Foil Sheet (5-1/4” x 1”)
·       Early Espresso card stock (5-14” x 7/8”; about 2-1/2” x 1-3/4”)
·       Soft Suede card stock (about 1-1/4” x 6”)
·       Very Vanilla card stock (about 2-1/2” x 1-3/4” for punch)
·       Glossy White card stock (about 2” x 6”)

Ink
·       Early Espresso Classic Stampin’ Pad
·       Cajun Craze Refill Ink
·       Crumb Cake Refill Ink
·       Crushed Curry Refill Ink

Accessories and Tools
·       Big Shot Die Cutting Machine
·       Seasonal Layers Thinlits Dies
·       Pinewood Planks Embossing Folder
·       Tailored Tag Punch
·       Wink of Stella Glitter Brush (Clear)
·       Stampin’ Sponge
·       5/8” Burlap Ribbon (6”)
·       Adhesives: Tear n Tape (optional); SNAIL; Glue Dots; Stampin’ Dimensionals

Miscellaneous Supplies
·       Cotton Balls
·       91% Isopropyl Alcohol

NOTES:

  1. To create the mat for the sentiment on the front, adhere the Very Vanilla tag to a larger piece of Early Espresso card stock and cut around the edges, leaving a slight border.  Use Stampin’ Dimensionals to adhere to front of card.
  2. Sponge Early Espresso ink around the edges of the card to add dimension.
  3. To create the vertical strip, adhere the Early Espresso strip over the Copper Foil strip, then adhere the Burlap Ribbon with Tear ‘n Tape or Glue Dots.  Wrap ends to the back and secure with glue dots.  Adhere the strip to the card before adding the leaves.
  4. Apply Clear Wink of Stella to the small leaves cut from Soft Suede card stock to add some subtle glimmer.
  5. To create the fun colors on the large leaves, first cut them out of Glossy White card stock.  Then add rubbing alcohol to a cotton ball so it’s saturated, but not drippy.  Add a few drops of each of the three Refill Inks shown above and start daubing.  (You also can create different looks by swiping rather than daubing.)  Mixed with the alcohol, the ink dries almost on contact with the paper, and you’re ready to attach them over the ribbon with Glue Dots.  (TIP:  This is how we made the leaves in class – if you’re planning to make several cards, to save time you can make an entire sheet of this beautiful glossy paper first, and then die cut the leaves.)
  6. A little alcohol and ink goes a long way, so we made lots and lots of leaves and added some of them to the inside of the card – just for fun.
Cathy ;D