Pages

Wednesday, February 21, 2018

DSP Cards (My February Craft Room Classes)

My February Craft Room Classes focused on using Designer Series Paper (DSP) to highlight your cards.  These are the cards we made -- see below for materials and instructions for each card (click on any photo for closer look).  WARNING:  Since this post contains instructions for all three class projects, it's pretty long . . . .


Petal Passion All-Occasion Card

Thanks to Stampin' Up! demo Robbie Rubala for inspiring this card.  View Robbie's original design at https://creationsinpaper.com/remarkable-you-from-stampin-up/


Materials

Stamp Set
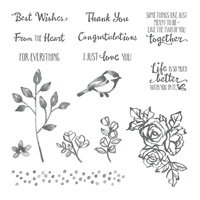
* Petal Palette (2018 Occasions Catalog)**

Paper
* Rich Razzleberry card stock (8-1/2" x 5-1/2"; 5" x 3-3/4")
* Basic Black card stock (5-1/8" x 3-7/8"; 3-1/8" x 3-1/8"; about 3-1/2" x 1-3/4" for die)
* Petal Passion Designer Series Paper ("DSP"; 3" x 3"; 2018 Occasions Catalog)
* Whisper White THICK card stock (about 3" x 2-1/2" for flower die)

Ink
* Basic Black Archival Stampin' Pad

Accessories and Tools
* Big Shot Die Cutting Machine
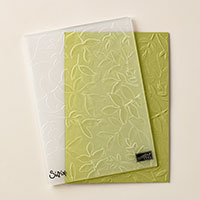
* Layered Leaves Dynamic Embossing Folder
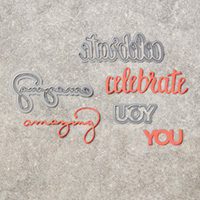
* Celebrate You Thinlits Dies (2018 Sale-a-Bration Brochure)***
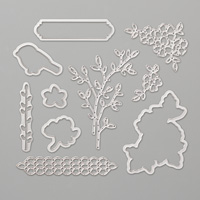
* Petals and More Thinlits Dies (2018 Occasions Catalog)**
* Aqua Painter or Blender Pen
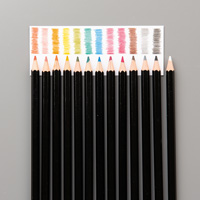
* Watercolor Pencils
* Adhesives:  SNAIL Adhesive; Stampin' Dimensionals; Multipurpose Liquid Glue

Instructions
(NOTE: Unless otherwise indicated, SNAIL Adhesive used to assemble card.)

1. Score 8-1/2" x 11" card stock at 4-1/4"; fold away from score line to create card base.

2. Adhere 5-1/8" x 3-7/8" Basic Black card stock to front of card.

3. Use embossing folder and Big Shot to add texture to 5" x 3-3/4" Rich Razzleberry card stock; adhere over Basic Black card stock.

4. Adhere 3" x 3" DSP to 3-1/8" x 3-1/8" Basic Black card stock.  Use Stampin' Dimensionals to attach to front of card at equal distances from top and side edges.

5. Stamp flower image on Whisper White THICK card stock.  Use Watercolor Pencils and Aqua Painter or Blender Pen to add color to flowers.  (I used Rich Razzleberry and Calypso Coral for the flowers; Old Olive for the leaves.)  Use Big Shot and Petals and More Thinlits Die to cut out flower.  Use Stampin' Dimensionals to attach flowers over DSP.

6. Use Celebrate You Thinlits Die to cut "amazing" from Basic Black card stock.  Adhere to card as shown with tiny dots of Multipurpose Liquid Glue.

That's it!  This card is complete!

** Save 10% through the end of May 2018 by purchasing the Petal Palette Bundle -- includes the 
Petal Palette Stamp Set and the Petals and More Thinlits Dies.

*** Earn the Celebrate You Thinlits Die for free with a minimum $100 Stampin' Up! catalog order.

** Save 10% through the end of May 2018 by purchasing the Petal Palette Bundle -- includes the 
Petal Palette Stamp Set and the Petals and More Thinlits Dies.

*** Earn the Celebrate You Thinlits Die for free with a minimum $100 Stampin' Up! catalog order.


Floral Thank You Card

This design is traditionally done with a technique sometimes called "Triple Time Stamping," where you layer up the pieces of white card stock and stamp all of your images at once, then insert card stock to cover the areas around each piece where the stamping has little gaps due to stamping on layers.  Since this was a DSP class, rather than stamping the three layers we used Designer Series Paper.


Materials

Stamp Set
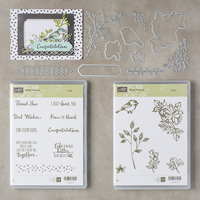
* Floral Phrases

Paper
* Tranquil Tide card stock (8-1/2" x 5-1/2"; 4-3/4" x 3-1/2"; 4" x 2-3/4")
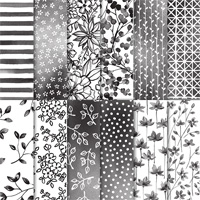
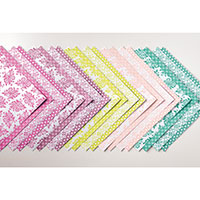
* Fresh Floral Designer Series Paper Stack ("DSP"; 5-1/4" x 4"; 4-1/2" x 3-1/4")
* Whisper White card stock (3-3/4" x 2-1/2")

Ink
* Tranquil Tide Classic Stampin' Pad

Accessories and Tools
* Stampin' Sponge (I cut mine in fourths for ease of use)
* 1/2" Finely Woven Ribbon (Tranquil Tide)
* Adhesive:  SNAIL Adhesive; Glue Dots

Instructions
(NOTE: Unless otherwise indicated, SNAIL Adhesive used to assemble card.)

1. Score 8-1/2" x 5-1/2" card stock at 4-1/4"; fold away from score line to create card base.

2. Select two contrasting or coordinating designs of DSP; use Stampin' Sponge to apply ink around edges of each piece.

3. Begin layering on front of card from the bottom up as follows:  5-1/4" x 4" DSP; 4-3/4" x 3-1/2" card stock; 4-1/2" x 3-1/4" DSP; 4" x 2-3/4" card stock.

4. On 3-3/4" x 2-1/2" Whisper White card stock, stamp floral design and sentiment.  Adhere over top layer of card stock.

5. Make a bow about 2" wide; cut tails to make completed bow about 3" wide.  Apply one or two glue dots behind knot and attach to card near bottom of Whisper White card stock.

How easy was this?!  And since this DSP comes with SO MUCH PAPER -- 40  12" x 12" sheets (4 each of 2 double-sided designs in 5 colors), this card will help you use up some of the designs that you would otherwise not have a use for.  The ribbon used is also available in the same 5 colors -- which makes it easy to coordinate an entire set of cards!


Delightful Daisy Thank You Card

This last card uses one of my favorite designs in the Delightful Daisy DSP set, and like the floral layered card, this card comes together very quickly.


Materials

Stamp Set
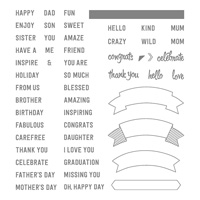
* Thoughtful Banners

Paper
* Chocolate Chip card stock (8-1/2" x 5-1/2")
* Whisper White card stock (5-1/8" x 3-7/8"; scrap for sentiment)
* Cajun Craze card stock (5" x 3-3/4")
* Whisper White THICK card stock (about 4-1/2" x 2-5/8" for leaves)
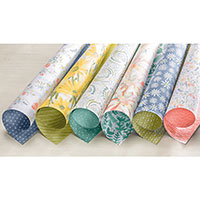
* Delightful Daisy Designer Series Paper ("DSP"; 3" x 3")

Ink
* Chocolate Chip Classic Stampin' Pad

Accessories and Tools
* Big Shot Die Cutting Machine
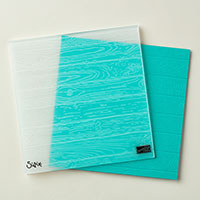
* Pinewood Planks Dynamic Embossing Folder
* Petals and More Thinlits Die (2018 Occasions Catalog)
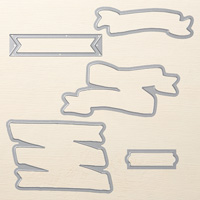
* Bunch of Banners Thinlits Dies
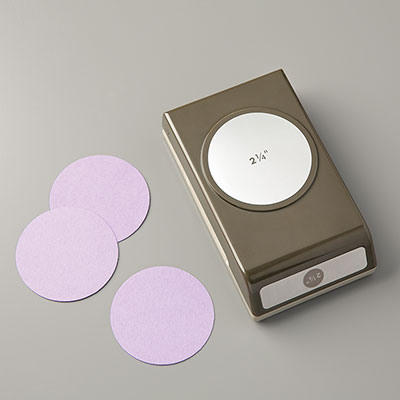
* 2-1/4" Circle Punch
* Linen Thread
* Adhesives: SNAIL Adhesive; Multipurpose Liquid Glue

Instructions
(Unless otherwise indicated, SNAIL Adhesive used to assemble card.)

1. Score 8-1/2" x 5-1/2" card stock at 4-1/4"; fold away from score line to create card.

2. Adhere 5-1/8" x 3-7/8" Whisper White card stock to front of card.  Adhere DSP over Whisper White card stock centered from side-to-side and about 1/4" to 1/2" from top of card stock.

3. Use Big Shot and Pinewood Planks embossing folder to add texture to 5" x 3-3/4" Cajun Craze card stock.  Use Circle Punch to cue circle in center of card near top (push top edge of paper all the way into the punch and position equal distances on each side before punching).  Adhere card stock to front of card so DSP shows through circle.

4. Cut leaves from Whisper White THICK card stock; apply tiny dots of Multipurpose Liquid Glue behind each of the solid leaves and near bottoms of stems and adhere to front of card as shown.   (NOTE:  I tried cutting the leaves from regular Whisper White card stock, but because it's so delicate, it felt flimsy and difficult to work with.  It was much better with the THICK card stock.)

5. Stamp sentiment on scrap of Whisper White card stock.  Use Big Shot and Bunch of Banners die to cut out sentiment.  Adhere to front of card as shown.

6. Make a loopy bow (mine has three loops) about 1-1/2" wide.  Adhere over stems as shown by applying a rolled-up glue dot behind the knot.

Again, a quick and easy card!

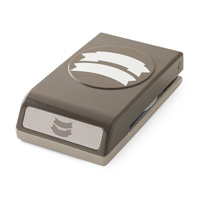
NOTE:  The Thoughtful Banners stamp set has a ton of other greetings that would work with the Bunch of Banners dies.  They are photopolymer and flexible, so they also coordinate great with the Duet Banner Punch (see image below).

All product images generated by SUDSOL, Free Trial at www.sudsol.org

I hope you enjoyed this REALLY LONG post!  I also hope this gave you some ideas of how to use up some of that DSP you have hanging around your papercrafting area!

Cathy  ;D

Tuesday, February 20, 2018

Encouragement Card (Stamp Camp North 02/10/2018)

Happy Tuesday Morning!  Seems like it's been a while since I posted a new card, so here's one for encouragement.  This is the card we made at my table at Stamp Camp North on February 10.

Click on image for closer look.
This design was inspired by a card maker in Grand Junction, Colorado.  I don't know her name (it doesn't appear on her blog), but she sure has made lots of great cards.  Below is her original card -- as you can see, mine doesn't really look at all like hers, but this was my starting point and inspiration. 
Visit this blog to see details.
Materials

Paper
* Tranquil Tide card stock (8-1/2" x 5-1/2"; scrap for "hope" die)
* Pool Party card stock (5-1/4" x 4"; about 5-1/2" x 4-1/4" for die cuts and circle punch)
* Whisper White card stock (5" x 3-3/4"; about 2" square for circle punch)
* Soft Sky card stock (4-7/8" x 3-5/8")

Ink
* Tranquil Tide Refill Ink

Accessories and Tools
* Big Shot Die Cutting Machine
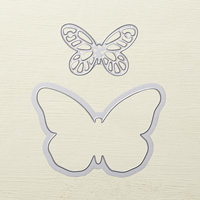
* Bold Butterfly Framelits Dies
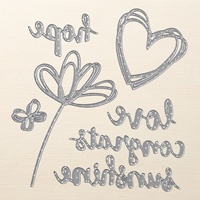
* Sunshine Wishes Thinlits Dies (hope)
* Petals and More Thinlits Dies (2018 Occasions catalog - leaves)
* Pinewood Planks Dynamic Embossing Folder
* 2" Circle Punch
* 2-1/4" Circle Punch
* Aqua Painter (filled with water and several drops of refill ink)
* Pearl Basic Jewels
* Adhesives:  SNAIL Adhesive; Multipurpose Liquid Glue

Instructions

1. Score 8-1/2" x 5-1/2" card stock at 4-1/4"; fold away from score line to create card base.

2. Adhere 5-1/4" x 4" Pool Party card stock to front of card; adhere 5" x 3-3/4" card stock over Pool Party.

3. Use Big Shot and Embossing Folder to add woodgrain texture to Soft Sky card stock; adhere over Whisper White card stock.

4. Cut shapes as follows:
* From Pool Party card stock, punch one 2-1/4" Circle.  Use Big Shot and Thinlits/Framelits Dies to cut butterfly and leaves.
* From Whisper White card stock, punch one 2" Circle.
* From Tranquil Tide use Big Shot and Thinlits Die to cut "hope."

5. Use Aqua Painter filled with water and refill ink to splash a little color onto 2" Whisper White circle.
NOTE:  I don't know exactly how much refill ink I added to the water, but just kept testing it and adding a few more drops until I obtained the shade I wanted.  I did this because I had lots of stampers making this card at the stamp camp.  To make just one card, an easier -- and probably less wasteful -- way to do it is to simply add a dot of refill ink to a flat non-porous surface (I use stampin' blocks).  Then get some water into the brush of your Aqua Painter and pick up some ink to mix with the water in the brush.  To splatter the ink, I use a Bone Folder to tap the solid part of the Aqua Painter right around the area where the brush screws into the reservoir.  Be careful to move everything else out of the way, though -- sometimes the splatters can be unpredictable!

6. To assemble the rest of the card, I used Multipurpose Liquid Glue (the one with the green cap).  Assemble as follows:
* Center and glue 2" Whisper White circle onto 2-1/4" Pool Party Circle; glue 2-1/4" circle to front of card as shown above.
* Apply tiny drops of glue to the solid leaves and the bottoms of the two stems and adhere leaves as shown.
* Apply glue to thick part of letters and apply "hope" to card as shown.
* Place your thumbnail next to the body of the butterfly at the base of the wing and fold back slightly -- do this for each wing.  Apply glue just to the body and adhere to card as shown.

7. The final step is to add a few self-adhesive Pearl Basic Jewels to the body of the butterfly.

Click on image for closer look.
Stampin' Up! also has some great stamps for the inside of this card.  On my sample I used Tranquil Tide ink to stamp one of the sentiments from the "You've Got This" stamp set.  Then I used Pool Party ink to stamp a couple of small butterflies from the Butterfly Basics stamp set.  Finally, just because I could, I splattered a little more of the Tranquil Tide water and ink solution from my Aqua Painter.

That's it!  A great card to use for sympathy, get well, or just a little encouragement when a friend is going through a rough patch.

NOTE:  I'm trying out something new.  I belong to an online Stampin' Up! Demo group (SUDSOL) that has a tool I can use to add photos of the products I've used for my projects.  So below I've added information for the embossing folder, dies and stamp sets I used to make this card.  I hope you like this feature.  If so, I'll continue using it.

Cathy  ;D

Saturday, February 17, 2018

NEW Sale-a-Bration Items Available!

Stampin' Up! has added some new Sale-a-Bration Items to the freebies you can earn with a minimum $50 or $100 catalog order.  All items from both SAB brochures are available through March 31, 2018.


Visit my Stampin' Up! website at http://www.stampinup.net/esuite/home/cathyhansen/ to view the new items.

Cathy  ;D


Friday, February 9, 2018

New Class Venue Beginning in March

Howdy, stampers!  I'm excited to announce that beginning March 9, I will be teaching classes at The Craft Box, a local second-hand store for crafters!  This isn't strictly a Stampin' Up! thing, but since I have a tremendous stash of Stampin' Up! products, it's a fair bet that I'll be using many of them (including retired stamps and tools).

If you missed the Brusho Crystal Colours class at my house last month, my first class at The Craft Box will offer another chance to learn three different Brusho techniques and make the same beautiful cards we made in my craft room.


The next class (March 23) will feature Beautiful Backgrounds -- three beautiful cards featuring different background techniques.


Be sure to watch my Upcoming Stampin' Events page for additional info, including how to sign up for these classes.

In the meantime, you should plan a visit to The Craft Box in their new location (formerly located in Golden; now located in Wheat Ridge (West 44th Ave. about nine blocks west of Sheridan Blvd.).  They offer great prices and a great inventory of paper crafting supplies, as well as yarn, fabric, needle crafting supplies (i.e., counted cross stitch, crewel embroidery, needlepoint), and many other miscellaneous crafting items!  A veritable crafter's paradise!!!

The Craft Box

6191 W. 44th Avenue
Wheat Ridge, CO 80033
 

303-279-1069


Looking forward to seeing you soon!

Cathy  ;D

Sunday, February 4, 2018

Brusho! Watercolor Cards (January Class Projects)

We had so much fun in my January classes playing with Brusho Crystal Colour!  And the results were stunning!

These are the cards we made.  See details below for each card.

(NOTE:  Simply stated, I don't do videos.  I will try to explain in detail how we used the Brusho crystals, but since a picture says a thousand words, you also might want to visit You Tube and search for "Brusho Crystal Colour."  There are a ton of video tutorials out there -- I especially enjoy the videos by Jennifer McGuire -- her instructions are very easy to understand and she doesn't stray far from the topic while she's demonstrating techniques.)

Click on photo for closer look.
NOTE:  Brusho Crystal Colour is a product offered by Stampin' Up! in the 2018 Occasions catalog -- permanent watercolor crystals with a burst of vivid color!  Easy and fun to use, plus everything you create looks as though you spent hours on it -- when you actually may have spent only a few minutes!  You don't need to add a lot of embellishment to your card because the designs look great without it!

WARNING:  Brusho is a permanent ink and can get a little messy while you're working with the crystals.  I usually cover my work space with a water resistant craft sheet and then cover that with several layers of paper towels.  It's also probably not a bad idea to wear an apron if you don't want to stain your clothes.


Materials

Stamp Set
* Jar of Love

Paper
* Basic Black card stock (8-1/2" x 5-1/2")
* Island Indigo card stock (5-1/4" x 4")
* Shimmery White card stock (5" x 3-3/4")
* Vellum card stock (about 2-1/2" x 2" for jar and bug)

Ink
* Basic Black Archival Stampin' Pad
* Basic Black refill ink
* Brusho Crystal Color

Accessories and Tools
* Big Shot Die Cutting Machine
* Everyday Jars Framelits Dies
* Aqua Painter or paint brush
* Linen Thread
* Clear Embossing Powder
* Heat Tool
* Adhesives: SNAIL Adhesive; Glue Dots

Instructions
(Note:  SNAIL Adhesive used to assemble card unless otherwise indicated.)

1. Score 8-1/2" x 5-1/2" Basic Black card stock at 4-1/4"; fold away from score line to create card base.

2. Adhere Island Indigo 5-1/4" x 4" card stock to front of card.

3. Use an Aqua Painter filled with water to scribble water in a random design on front of Shimmery White card stock (NOTE:  I started with a small scribble at the bottom of the card stock that would fit behind the jar and then worked into a larger scribble toward the top of the card stock).  Immediately sprinkle Prussian Blue and Moss Green Brusho crystals over water -- the paper should still be very wet when you sprinkle the crystals.  (IMPORTANT NOTE:  A little goes a long way, so sprinkle sparingly.)

If the water is "puddly" wet, the crystals will immediately start "exploding" and spreading color across the water.  If you don't get the results you like, don't be afraid to use your Aqua Painter to spread the color around and/or add more water.  Be sure to let paper dry completely before assembling card.  You can either set it aside for a while or use your Heat Tool to dry the paper.

4. Once the paper is dry, use an old paint brush or an Aqua Painter to add the sprinkle of dots as follows:  Apply a small drop of Basic Black refill ink to a flat surface (I use an acrylic stampin' block).  Making sure there's a lot of water in the brush, pick up just a tiny amount of Basic Black ink with the Aqua Painter.  Hold Aqua Painter over the card stock and tap on the top with a bone folder or pen or other tool to splash the sprinkles of color on the card stock.  (NOTE:  This technique will permanently stain your Aqua Painter -- I've got one specially designated for "Black Speckles" so I don't use it for anything else.)

Once card stock is completely dry, you can finish the card.

5. Use Basic Black ink to stamp weed (or twig or whatever it is) over scribble as shown.  Keep in mind that the bottom of the twig should appear to be inside the jar.

6. Use Basic Black ink to stamp and bug on Vellum card stock.  Emboss with clear embossing powder.  Use Big Shot and Framelits dies to cut out jar and bug.

(NOTE: Normally, I wouldn't use Basic Black ink for embossing; however, Vellum card stock is very smooth and non-porous, so the ink sits on the surface and stays wet a little longer than on regular paper, allowing you time to apply the embossing powder.)

7.  Wrap linen thread around neck of jar twice and tie bow in front.  Use a glue dot in each corner of jar to adhere to front of card covering bottom part of scribble.  Use one glue dot to add bug wherever it makes you happy!!!

- oOo -


Materials

Stamp Set
* Beautiful Day (2018 Occasions Catalog)

Paper
* Calypso Coral card stock (8-1/2" x 5-1/2")
* Pear Pizzazz card stock (5-1/4" x 4")
* Watercolor Paper (5" x 3-3/4")
* Whisper White card stock (scrap for sentiment)

Ink
* VersaMark Pad
* Pear Pizzazz Classic Stampin' Pad
* Brusho Crystal Colour

Accessories and Tools
* Aqua Painter or paint brush
* Clear Embossing Powder
* Heat Tool
* Pear Pizzazz 3/8" Shimmer Ribbon
* Old Olive Baker's Twine
* Stampin' Sponge

Instructions
(SNAIL Adhesive used to assemble card unless otherwise indicated.)

1. Score 8-1/2" x 5-1/2" Calypso Coral card stock at 4-1/4"; fold away from score line to create card base.

2. Adhere Pear Pizzazz 5-1/4" x 4" card stock to front of card.

3. Use VersaMark ink to stamp flower image on Watercolor Paper.  Emboss with clear embossing powder.

4. Sprinkle a small amount of Gamboge (orange) Brusho crystals into small container (I used a small paint tray).  Add a drop or two of water to create ink.  Use Aqua Painter filled with water or a paint brush to paint inner petals of flower.

5. Repeat with Brilliant Red Brusho crystals.  Use this color to paint outer petals and center of flower.

6. Repeat with Moss Green Brusho crystals.  Use this color to paint leaf.

Set paper aside to dry (or heat with heat tool).  (NOTE:  If color isn't as intense as you would like, you can paint over the first layer until you get the results you want -- be sure to use a light touch so you don't rub away the surface of the paper.)

7. When paper is dry, randomly sprinkle just a few Yellow and Moss Green crystals randomly around background.  Use Stampin' Spritzer to spray water over card and watch the magic happen!  The Yellow and Moss Green crystals will burst into color and blend together as the water hits them.  Want more color?  Just add a few more crystals and spritz again.

Once Watercolor Paper is completely dry, you can finish assembling the card.

8. Wrap 3/8" Shimmer Ribbon from front to back and adhere in back.  Holding two pieces of Baker's Twine together, tie a bow around Shimmer Ribbon as shown.

9. Use Pear Pizzazz ink to stamp sentiment on scrap of Whisper White card stock.  Cut or tear paper to desired shape, and use a Stampin' Sponge to apply Pear Pizzazz ink around edges.  Use Stampin' Dimensionals to adhere to front of card over ribbon.

- oOo-


Materials

Stamp Set
* Beautiful Day (2018 Occasions Catalog)

Paper
* Dapper Denim card stock (8-1/2" x 5-1/2")
* Whisper White card stock (5-1/4" x 4")
* Watercolor Paper (5" x 3-3/4")

Ink
* VersaMark Pad

Accessories and Tools
* Aqua Painter or paint brush
* Clear Embossing Powder
* Crushed Curry Solid Baker's Twine
* Adhesives: SNAIL Adhesive

Instructions

1. Score 8-1/2" x 5-1/2" Dapper Denim card stock at 4-1/4"; fold away from score line to create card base.

2. Adhere Whisper White 5-1/4" x 4" card stock to front of card.

3. Use VersaMark ink to stamp butterflies on Watercolor Paper.  Emboss with clear embossing powder.

4. Use Aqua Painter filled with water to paint the butterflies.  Sprinkle a few crystals of Prussian Blue and Yellow Brusho over butterflies and watch the colors burst and blend together.  (NOTE: Water should be "puddly" wet for this to work, but don't worry -- if the crystals don't blend together the way you want, you can use your Aqua Painter to add water and move the color around.)  Set aside or use Heat Tool to dry.

5. Once paper is completely dry, sprinkle a few crystals of Yellow and Moss Green around background.  Spritz with water to make the colors burst and blend together.  Set aside or use Heat Tool to dry.

Once paper is completely dry, you can finish assembling your card.

6. Wrap Baker's Twine around Watercolor Paper three times and tie bow in front.  Adhere to front of card.

That's it!  In a short time, you've created three beautiful, artistic cards that you'll be proud to share with everyone!

Hope you enjoyed these projects.

Cathy  ;D


Friday, February 2, 2018

Cards from Stamp Camp North 01/13/2018

Here are the cards made at all of the tables at Stamp Camp North on January 13, 2018.  Some great ideas here!  Many use sets from the 2018 Occasions and Sale-a-Bration catalogs.  (Click on any photo to get a closer look.)

 
Cathy  ;D