NOTE: This card was intended to be a Thanksgiving card, but you can easily adapt it for birthday, get well, or any other occasion by using a different sentiment.
 |
| Click on photo for closer look. |
Stamp Set
* Painted Harvest (sentiment)
* Colorful Seasons (inside)
Paper
* Cajun Craze card stock (8-1/" x 5-1/2"; about 2-1/4" x 2-1/4" for detailed leaf)
* Very Vanilla card stock (5-1/2" x 2"; 3-1/2" x 1" for banner; 5-1/4" x 4" for inside)
* Soft Suede card stock (5-1/2" x 1-3/4")
* Crumb Cake card stock (2-1/4" x 2-1/4" for circle)
* Early Espresso card stock (2" x 2" for leaf punch)
Ink
* Early Espresso Classic Stampin' Pad
* Soft Suede Classic Stampin' Pad
Accessories and Tools
* Big Shot Die Cutting Machine
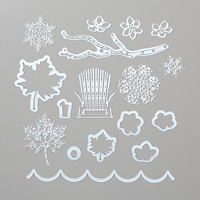
* Seasonal Layers Framelits Dies (detailed leaf)
* Lakeside Framelits Dies (banner)
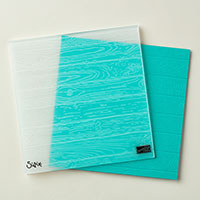
* Pinewood Planks Embossing Folder
* Corrugated Dynamic Embossing Folder
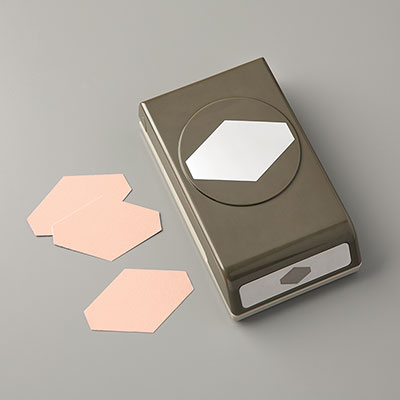
* Leaf Punch
* 2-1/4" Circle Punch
* Linen Thread
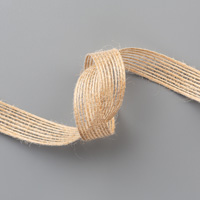
* 1/4" Copper Trim (about 1-1/2")
* Wink of Stella (clear)
* Stampin' Sponge
* Adhesives (SNAIL Adhesive; Stampin' Dimensionals; Glue Dots; Tombow Liquid Glue)
Instructions
(NOTE: SNAIL Adhesive used to assemble card unless otherwise indicated)
1. Score 8-1/2" x 5-1/2" Cajun Craze card stock at 4-1/4"; fold away from score line to create card.
2. Using Big Shot and Pinewood Planks Embossing Folder, emboss just the front panel of the card.
3. Use Stampin' Sponge and Soft Suede ink to sponge ink around edges of 5-1/2" x 2" Very Vanilla card stock. Adhere to front of card as shown.
4. Adhere Soft Suede 5-1/2" x 1-3/4" card stock over Very Vanilla card stock.
5. Use Early Espresso ink to stamp sentiment on Very Vanilla card stock; cut out image with banner die; apply Soft Suede ink around edges with Stampin' Sponge. Adhere to card as shown.
6. Punch circle from Crumb Cake card stock; use Big Shot and Corrugated Embossing Folder to add texture; sponge Soft Suede Ink around edges with Stampin' Sponge. Set aside until Step 9 below.
7. Use Big Shot and Seasonal Layers Framelits Die to cut detailed maple leaf from Cajun Craze card stock. Apply Wink of Stella clear glitter. Set aside until Step 9 below.
8. Use Leaf Punch to cut leaves from Early Espresso card stock. Apply Wink of Stella clear glitter. See Step 9 below for assembly.
9. Assemble focal piece as follows
* Use a few small dots of Liquid Glue to adhere Early Espresso leaves to Crumb Cake circle.
* Adhere Detailed Leaf over Early Espresso leaves with a few tiny drops of Liquid Glue.
* Make a 3-loop bow about 2" wide. Tie Copper Trim around center of bow and pull out edges of trim to create a "meshy" look. Adhere over stem of Detailed Leaf with a Glue Dot behind knot.
* Adhere Circle to card with Stampin' Dimensionals.
 |
| Click on photo for closer look. |
For the inside piece, use Stampin' Sponge to apply Soft Suede ink around edges of 5-1/4" x 4" Very Vanilla card stock and then stamp a few leaves from Colorful Seasons using Cajun Craze ink. To make various shades of the small solid leaves, ink up the stamp and then stamp several leaves before re-inking.
Hope you enjoy this card!
Cathy ;D