|
| Click on image for closer look. |
See detailed instructions for each card below.
✴✴✴
 |
| "Black Ice" |
Materials
Stamp Set
* Heartfelt Blooms (free Sale-a-Bration stamp set; available through March 31, 2018)
Paper
* Basic Black card stock (8-1/2" x 5-1/2"; 4" x 3-1/2")
* Basic Gray card stock (5-1/4" x 5")
* Whisper White card stock (3-3/4" x 3-1/4")
* Silver Foil Sheet (3" x 3")
Ink
* Basic Black Archival Stampin' Pad
* VersaMark Pad
Accessories and Tools
* 3/8" Black Shimmer Ribbon (about 4-1/2")
* Clear Embossing Powder
* Heat Tool
* Adhesives: SNAIL Adhesive; Stampin' Dimensionals
Instructions
(NOTE: Unless otherwise indicated, SNAIL Adhesive used to assemble card.)
1. Score 8-1/2" x 5-1/2" card stock at 4-1/4"; fold away from score line to create card base.
2. Drag Basic Black Stampin' Pad very lightly across Basic Gray card stock from top to bottom and from bottom to top. (The idea is to create a very slight edge and very light vertical streaks on the card stock.) Adhere Basic Gray card stock to card front.
3. Repeat process in Step 2 on Silver Foil, and then stamp image with Basic Black. Use Heat Tool to dry ink.
4. Using VersaMark Pad, repeat the same process, dragging pad across Silver Foil very lightly to create streaks of ink. Sprinkle Clear Embossing Powder over paper, tap off excess, and use Heat Tool to melt embossing powder. You should see vertical streaks of embossing.
5. Wrap ribbon around 3-1/4" x 3-3/4" Whisper White card stock from front to back and adhere in back; adhere Whisper White card stock to 4" x 3-1/2" Basic Black card stock. Adhere Silver Foil to Whisper White card stock. Use Stampin' Dimensionals to adhere this layered piece to front of card as shown.
Easy peasy, right?! And so elegant!!!
✴✴✴
 |
| "Impressions of Tarnished Foil" |
Materials
Stamp Set
* Birthday Wishes for You (2018 Occasions Catalog)
Paper
* Basic Black card stock (8-1/2" x 5-1/2"; 4-1/4" x 2-1/4")
* Soft Suede card stock (5-1/4" x 1-3/4")
* Smoky Slate card stock (4-3/4" x 2-3/4")
* Basic Gray card stock (4-1/2" x 2-1/2")
* Crumb Cake card stock (4" x 2")
* Copper Foil Sheet (5-1/4" x 2-1/8")
Ink
* Black StazOn Ink Pad (see note below)
* VersaMark Ink Pad
* Crumb Cake Refill Ink
* Smoky Slate Refill Ink
Accessories and Tools
* Big Shot Die Cutting Machine
* Basketweave Embossing Folder (currently featured in the second Sale-a-Bration release)
* Silver Embossing Powder
* Gold Embossing Powder
* Heat Tool
* Blender Pen
* Adhesives: SNAIL Adhesive; Stampin' Dimensionals
NOTE: Melissa used Black StazOn ink for her technique; however, since Stampin' Up! no longer sells this item, and the Basic Black Archival ink has some of the same properties, you probably could use Basic Black ink instead -- I haven't tried it.
Instructions
(NOTE: SNAIL Adhesive used to assemble card unless otherwise indicated.)
1. Score 8-1/2" x 5-1/2" card stock at 4-1/4"; fold away from score line to create card base.
2. Drag Black ink pad very lightly across Soft Suede card stock from one short end to the other; repeat from other end. (The idea is to just define the edges and create vertical streaks across the card stock.) Adhere card stock 1/8" from top and side edges of card.
3. To create Tarnished Foil:
* Use Big Shot and Embossing Folder to add texture to Copper Foil.
* Daub VersaMark Pad randomly on Foil; add Silver Embossing Powder, tap off excess, and emboss with Heat Tool. (NOTE: If edges of ink pad create angular lines on foil, simply use your finger to rub off excess embossing powder to soften the edges before heating.)
* Repeat last step using Gold Embossing Powder. (NOTE: Don't cover the entire piece with embossing powder -- be sure to leave some areas of copper peaking out as well.)
* Rub spots of StazOn ink randomly over foil piece and along edges. (NOTE: A fairly dry pad works best for this.)
Adhere Copper Foil to card front 1/8" from bottom and side edges, leaving 1/8" between the foil and Soft Suede card stock.
4. Stamp Happy Birthday image on Crumb Cake card stock. Using Blender Pen, pick up a tiny dot of Smoky Slate ink and start painting from bottom of the first letter in Birthday, moving toward the top until the pen runs clear; repeat for remaining letters and for banner. Then pick up a tiny dot of Crumb Cake ink and repeat this process starting from the top of the banner and each letter and moving downward.
5. Layer up and adhere remaining pieces of card stock together as follows (from bottom to top): Smoky Slate, Basic Gray, Basic Black, Crumb Cake. Use Stampin' Dimensionals to adhere this piece to card front as shown.
Another elegant card finished!
✴✴✴

Since the first two cards in this set are techniques, the third card is a very simple cut and assemble project (with a tiny bit of stamping and heat embossing).
Materials
Stamp Set
* Dragonfly Dreams
Paper
* Basic Black card stock (8-1/2" x 5-1/2")
* Always Artichoke card stock (5-1/4" x 4"; 3" x 3/4")
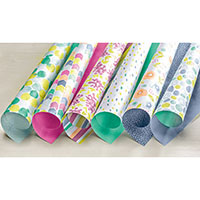
* Springtime Foil Specialty Designer Series Paper (5" x 2") (Sale-a-Bration Second Release)
* Pear Pizzazz (2-1/4" x 2-1/4")
* Whisper White card stock (3" x 3/4")
Ink
* VersaMark Ink Pad
Accessories and Tools
* Big Shot Die Cutting Machine
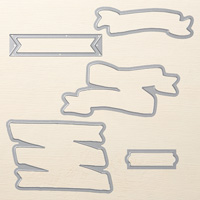
* Detailed Dragonflies Thinlits Dies
* Petals and More Thinlits Dies (2018 Occasions Catalog)
* Copper Embossing Powder
* Heat Tool
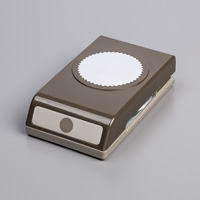
* 2-1/4" Circle Punch
* Adhesives: SNAIL Adhesive; Multipurpose Liquid Glue
Instructions
(NOTE: Unless otherwise indicated, SNAIL Adhesive used to assemble card.)
1. Score 8-1/2" x 5-1/2" card stock at 4-1/4"; fold away from score line to create card base.
2. Adhere 5-1/4" x 4" Always Artichoke card stock to card front.
3. Adhere Designer Series Paper ("DSP") 1/8" from left edge of Always Artichoke card stock.
4. Punch 2-1/4" circle from Pear Pizzazz card stock and adhere over DSP as shown.
5. Use Big Shot to cut label (from Petals and More Dies) from Always Artichoke card stock. Use VersaMark ink to stamp sentiment on Whisper White card stock; emboss with Copper Embossing Powder and Heat Tool; cut label with Big Shot. Adhere Whisper White label over Always Artichoke label, offsetting slightly toward the bottom right. Adhere label to front of card as shown.
6. Use Big Shot to cut dragonflies (Detailed Dragonflies Dies) from Copper Foil. Use dots of Liquid Glue to adhere to front of card as shown.
I hope you try the techniques from the first two cards -- as I mentioned above, the techniques are way easier than they look and really don't take that much time. The end result is very elegant.
Cathy ;D