 |
| Click on image for larger view |
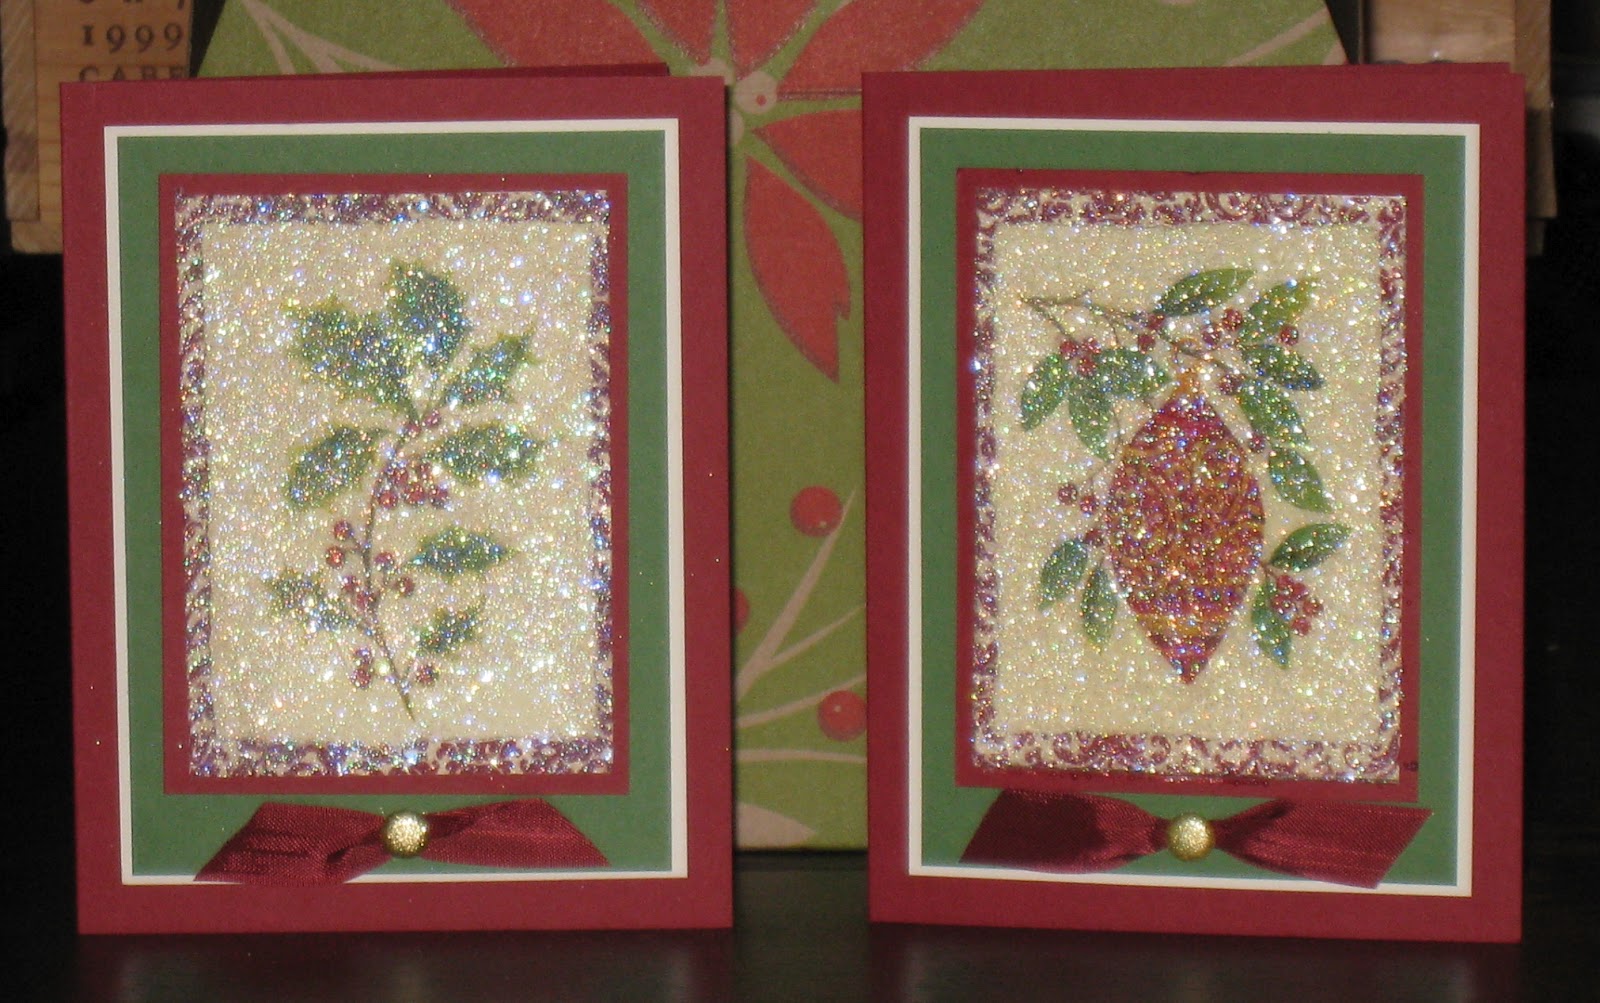
Materials:
Paper:
* Cherry Cobbler card stock (8-1/2" x 5-1/2"; 4" x 3")
* Garden Green card stock (4-3/4" x 3-1/2")
* Very Vanilla card stock (4-7/8" x 3-5/8"; 3-3/4" x 2-3/4")
Ink:
* VersaMark Pad
Accessories & Tools:
* Multipurpose Adhesive Sheets (3-3/4" x 2-3/4")
* Heat and Stick Powder
* Dazzling Diamonds Stampin' Glitter
* Clear Stampin' Emboss Powder
* Glimmer Brad
* Paper-Piercing Tool
* Stampin' Pierce Mat
* Cherry Cobbler Seam Binding Ribbon (about 3")
* SNAIL Adhesive
* Stampin' Dimensionals
Miscellaneous:
* 2- or 3-ply napkin with holiday design
Instructions:
(Unless otherwise indicated, SNAIL Adhesive was used to assemble this card)
1. Score 8-1/2" x 5-1/2" card stock at 4-1/4"; fold away from scoreline to create card.
2. Adhere Garden Green card stock to 4-7/8" x 3-5/8" Very Vanilla card stock. Using Stampin' Pierce Mat and Paper-Piercing Tool, punch a hole about 1/4" from bottom center of card stock. Open prongs of brad and smoosh the center of the ribbon between the prongs and all the way down to the head of the brad. Close prongs and attach to card stock. Once you open the prongs back up on the back of the card stock, the brad will hold the ribbon in place. Adhere card stock to front of card.
3. Cut a 3-3/4" x 2-3/4" design from the napkin. Separate all the plies of the napkin and discard the back layers -- you will be using only the very thin top layer for this technique.
4. Remove backing from Multipurpose Adhesive Sheet and place on your work surface with the sticky side up. Place 3-3/4" x 2-3/4" Very Vanilla card stock over the sheet and smooth out. Now place the napkin design on your work surface, design side down. Remove remaining backing from the adhesive sheet and place it over the back of the napkin. Turn it over and smooth out wrinkles and bubbles.
5. Completely cover napkin with VersaMark and cover with Heat and Stick Powder. Heat with Heat Tool until completely melted, then cover with Stampin' Glitter. Heat with Heat Tool again to set the glitter.
You could end here, but I've added one more step to really seal in the glitter and enhance the richness of the colors.
6. Completely cover the glitter with another layer of VersaMark and cover with Clear Stampin' Emboss Powder. Heat with Heat Tool to melt embossing powder. Allow to cool for a minute or two.
7. Adhere glittered design card stock to 4" x 3" Cherry Cobbler card stock. Adhere to front of card with Stampin' Dimensionals.
A few tips:
* Look for napkins with bright, vibrant designs that have a lot of conrast. I found when doing this technique on subtle designs that the design gets lost behind the glitter.
* If your VersaMark Pad gets completely engulfed in glitter, just take a piece of packing tape and lay it sticky side down on top of your pad. When you lift it back up, the glitter will be stuck to the tape. (You may have to repeat this a few times to remove all of the glitter.)
That's it! Hope you enjoy this technique. And thanks again to Connie for demoing it!!!!
Cath ;D
No comments:
Post a Comment